OAuth Client Management
Application ID
An application ID is required to make API requests to the Workspace API, in order to obtain one you have to create an OAuth client as described on this page.
API requests must contain either the Citrix-ApplicationId header, or the ApplicationId query parameter with the value set to the above mentioned application ID. The Open API spec guides you on which is required for what endpoints, see the API Exploration page.
OAuth Client Registration
To perform the OIDC authentication steps, it is necessary to request a Client.
Depending on the type of application you want to build either a public or private (confidential) client needs to be created.
Public Client
For native applications that handle the authorization code flow with PKCE and store the access and refresh token in memory, you need to request a public client as the application won’t be able to securely store the private client secret.
For web applications running in a browser, it is not possible to use a public client due to CORS. Instead you must use a private client and create a backend service using a pattern such as token mediating backend (TMB) or backend for frontend (BFF).
Private Client
For server side web clients - including the example Token Management Service - you should request a private client. The private client supports the standard authorization code flow or the authorization code flow with PKCE.
Creating a Client
-
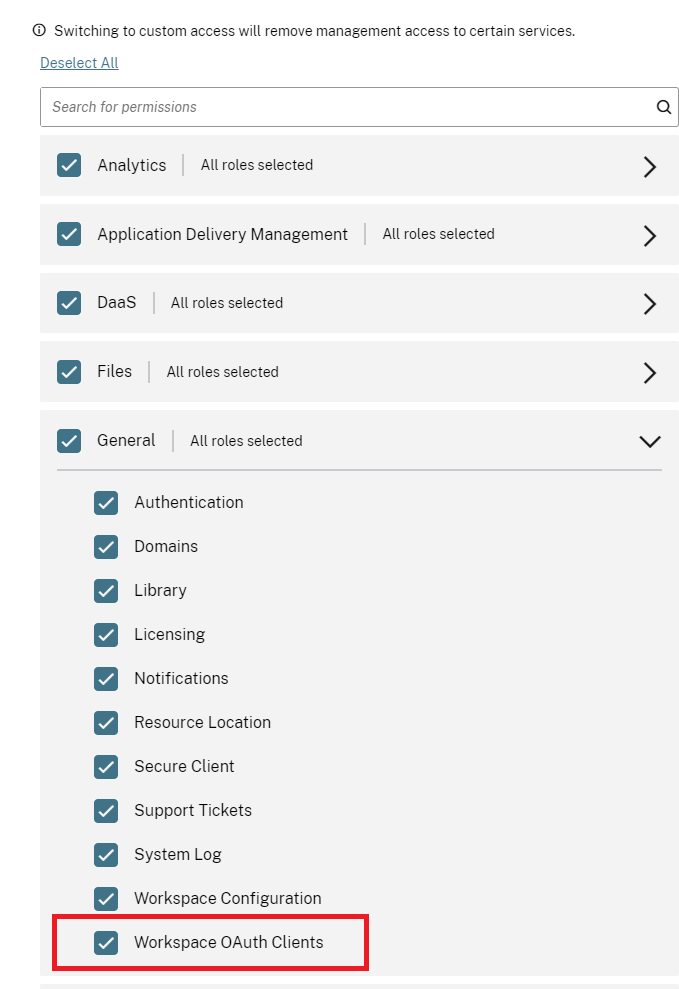
Login to the Citrix Cloud Admin Portal and select the customer you’d like to register a client for. The account you login with needs to be either be a ‘Full’ admin, or a custom admin with the ‘Workspace OAuth Clients’ permission selected.
Warning:
It is recommended to assign the Workspace OAuth clients custom role with caution. The access privileges associated with this role might enable administrators to access end user’s resources (VDAs or applications) on the Workspace platform. It is also important to note that administrators with Full access automatically have access permissions equivalent to that of an administrator with the Workspace OAuth clients permission.
-
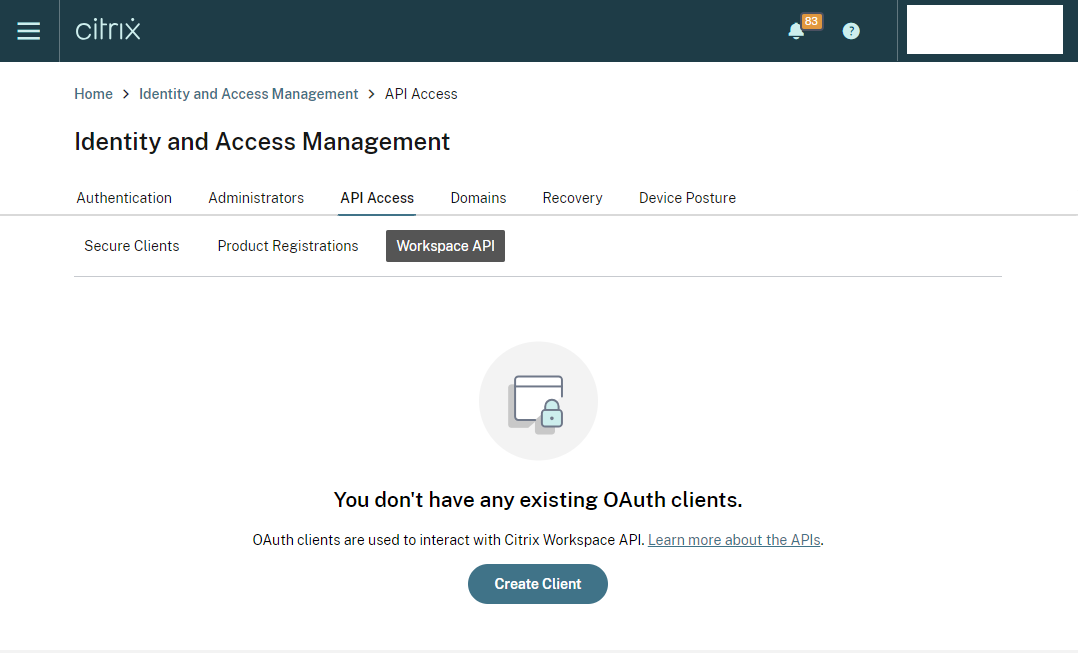
Navigate to ‘Identity and Access Management’ - ‘API Access’ - ‘Workspace API’
-
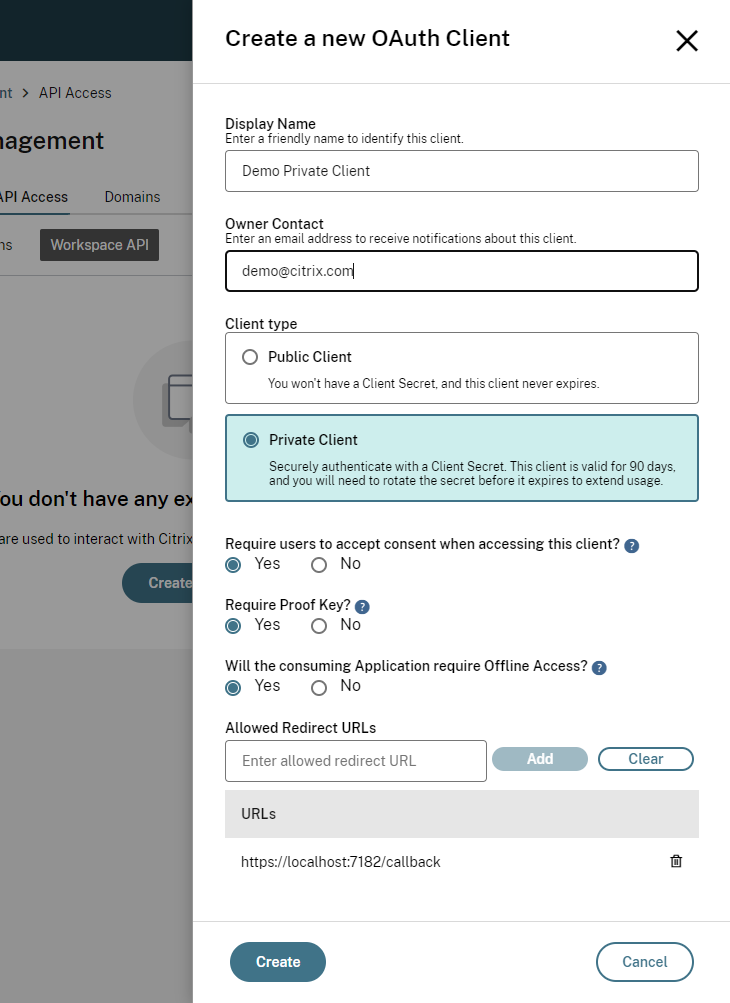
Select ‘Create Client’ and fill out the required details, here is an example that works with the sample applications:
-
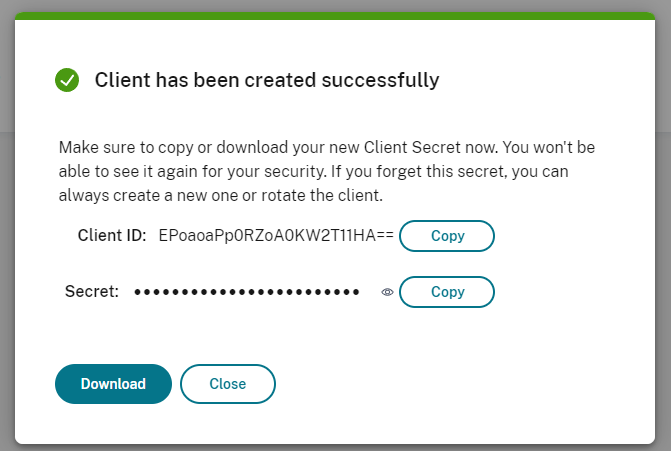
For a Private Client, once you click ‘Create’ a modal appears with the Client ID and Secret for you to download and copy:
-
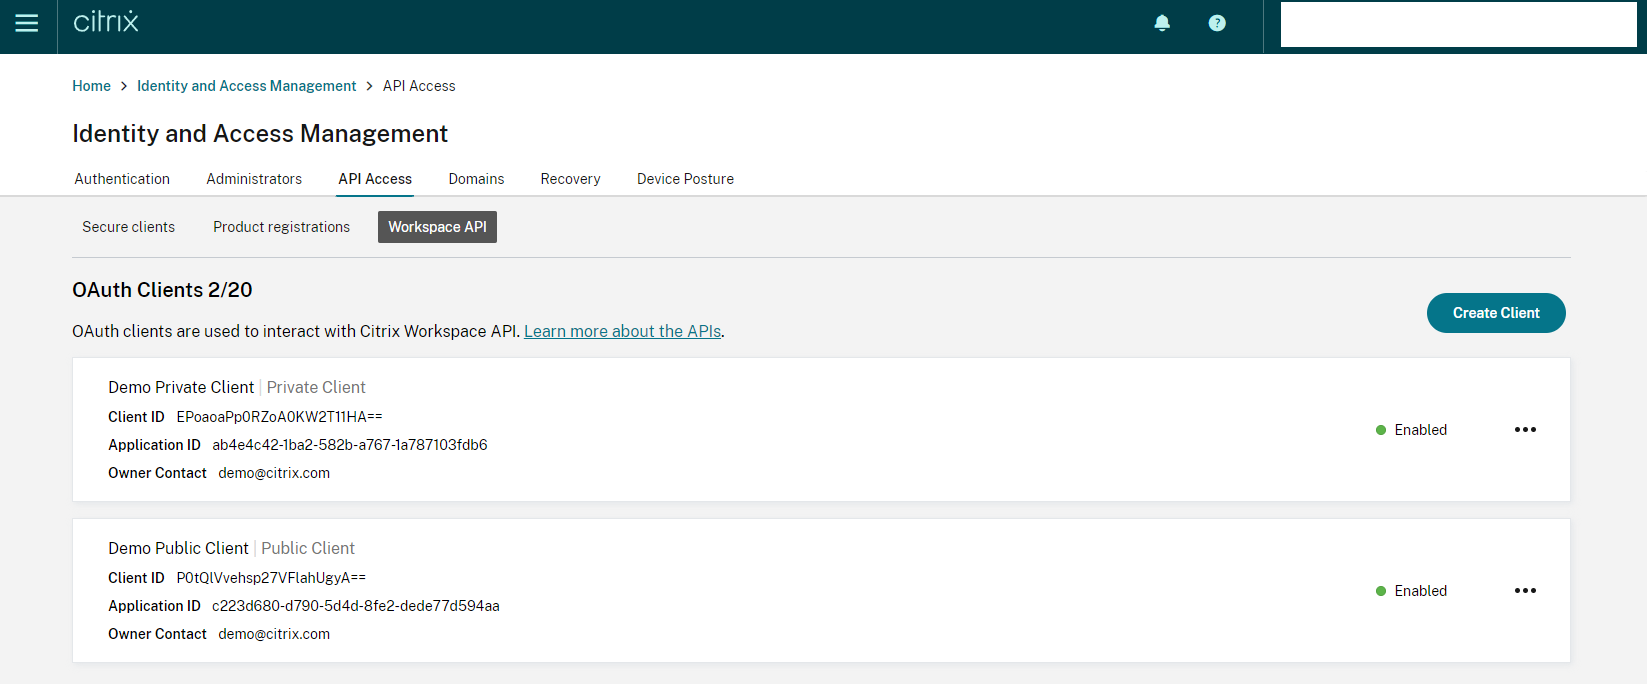
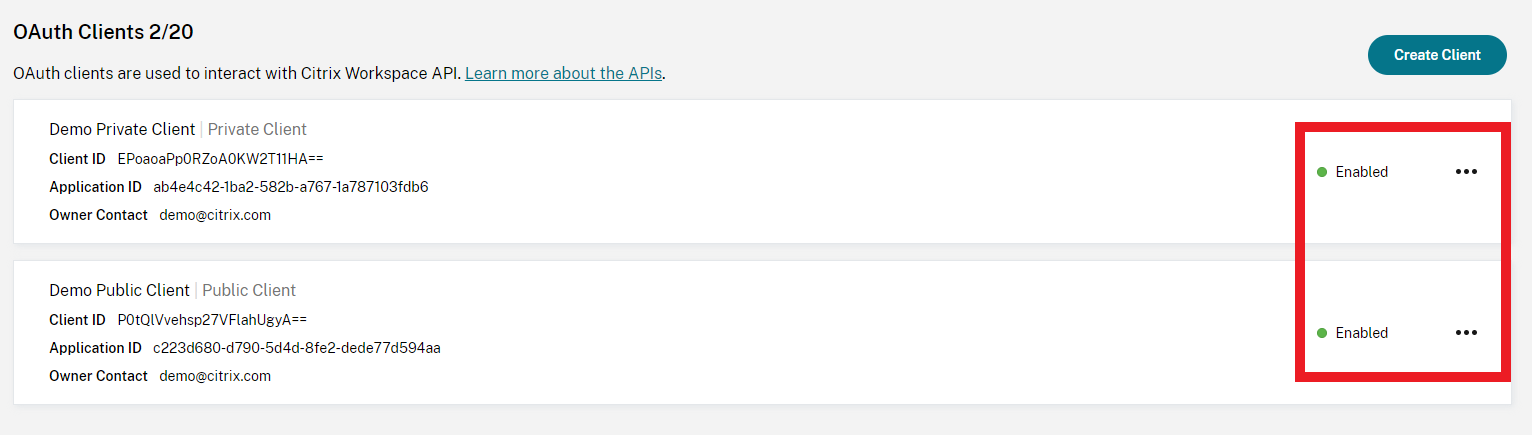
You are able to see all your created clients on the page:
Client Validity and Rotation Requirements
For Private Clients only.
Client secrets are valid for a period of 90 days and need rotating before this elapses. Please see instructions on rotating the client secret below.
Before undertaking development that relies on your client secret being valid, ensure that you are able to rotate, update applications using, and expire your client secret using the guide.
OAuth 2.0 Client Rotation
OAuth 2.0 private clients are valid for a period of 90 days. The validity period ensures that the owner of the client follows recommended security practices.
A reminder email is automatically sent to the ‘Owner Contact’ when the client gets close to expiry.
To rotate the client:
Manual Rotation
- Login to Citrix Cloud Admin Portal and navigate to ‘Identity and Access Management’ - ‘API Access’ - ‘Workspace API’.
-
Find the client you want to rotate in the client list (a warning is shown when a client is close to expiry), click on the three dots, and select ‘Edit this client’:

-
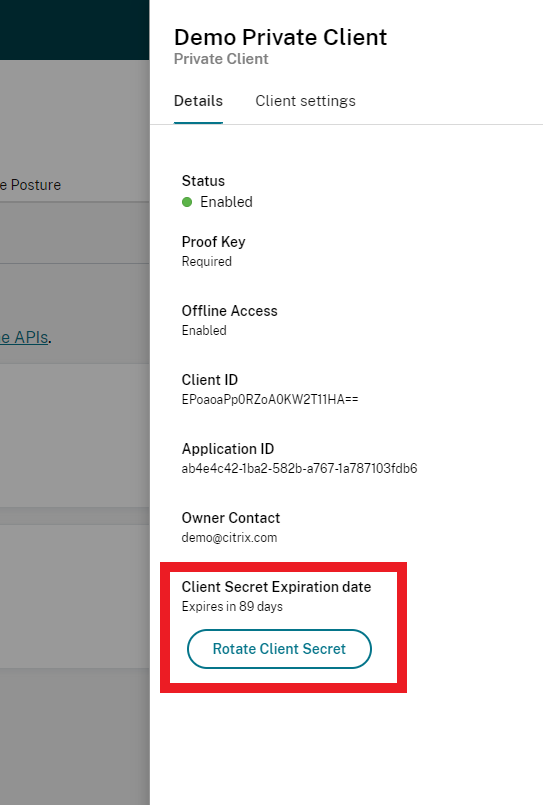
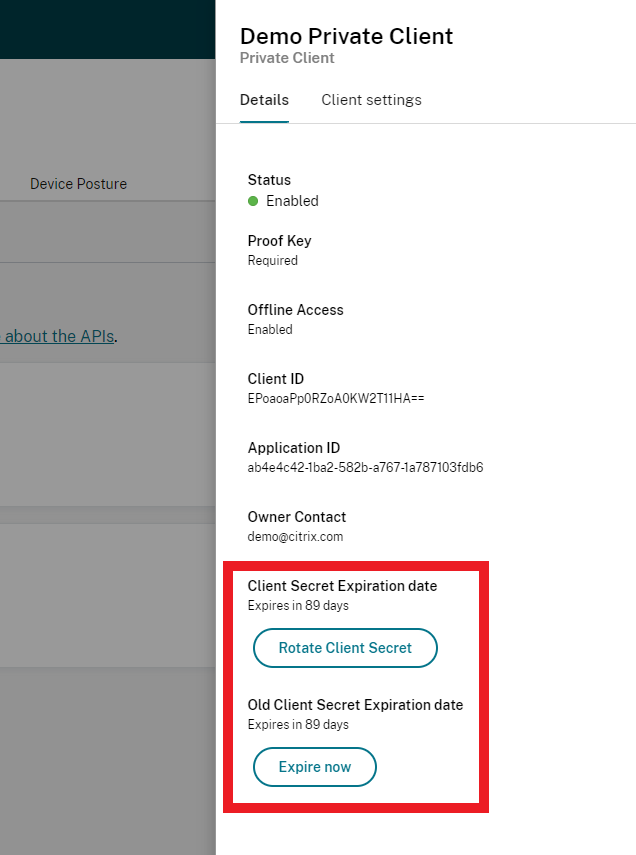
Here you are able to see the client details and perform a few operations, here we are interested in the ‘Client Secret Expiration date’ and the ‘Rotate Client Secret’ button:
-
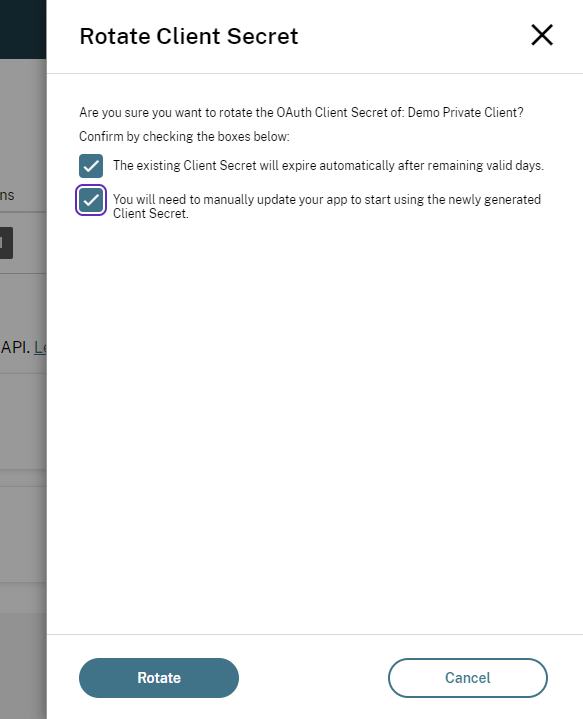
Clicking the ‘Rotate Client Secret’ button shows you a page giving some more information on client rotation. Once agreeing to the terms, click ‘Rotate’:
-
A modal shows you the new Client secret including the Client ID, giving you the ability to download and copy the information:

Once the client has been rotated, you can start using the new Client secret in your application, and the old secret continues to work until it expires, or until you trigger an expiry:
-
Navigate to the client details page by clicking ‘Edit this client’ and you’ll be able to see the new secret Expiration date, alongside the old secret Expiration date:
-
Click on the ‘Expire Now’ secret to bring up the confirmation page:
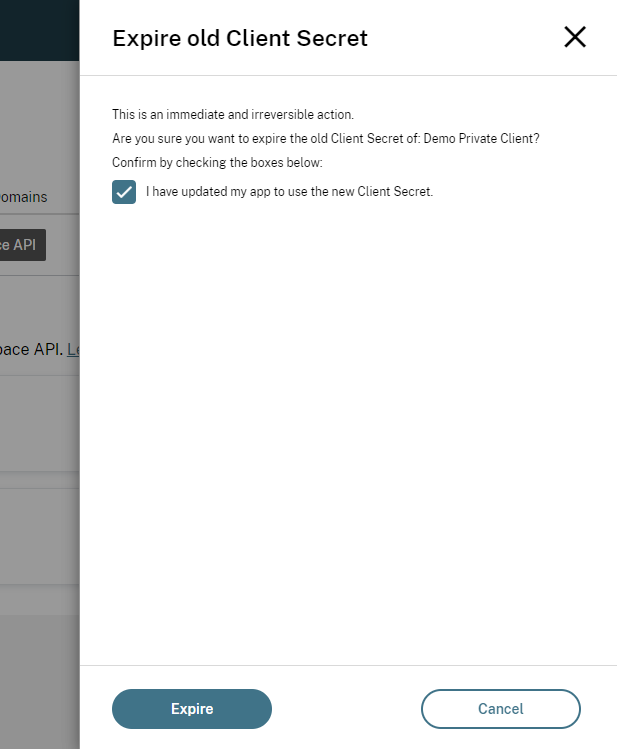
-
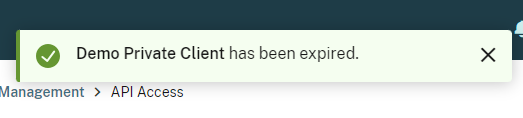
A confirmation is displayed showing the old Client secret has been expired and no longer works:
Programmatic Rotation
It is possible to perform the client rotation and secret expiry using the Citrix Cloud API, this might be useful if you want to automate the client rotation.
Before you perform the rotation, consider the following:
- The existing Client Secret expires automatically after remaining valid days.
- You need to manually update your app to start using the newly generated Client Secret.
To perform the rotation:
- Follow the Citrix Cloud API guide to create a secure client and obtain a CC Bearer Token.
-
Perform a web request to find all your customer clients to find the client
namewhich is used to perform the rotation:Request:
 curl https://cws.citrixworkspacesapi.net/{CUSTOMER_ID}/rpclients --header "Authorization: CWSAuth bearer=$token"
 <!--NeedCopy-->
Note: The CUSTOMER_ID can be found on the Citrix Cloud secure client page (see step 1).
Response:
[ { "name": "customer-private-305", "display_name": "Demo Client", "api_key": "api_key", "secret_update_time": 1686218219, "secret_expiration": 1693958400, "secret_update_time_old": null, "secret_expiration_old": null, "owner": "customer@customer.com", ... }, ... ] <!--NeedCopy--> -
Using the above response, you can determine if you want to rotate the client based upon the
secret_expirationvalue, which is a Unix timestamp. -
Perform a web request to rotate the client. In the response, you’ll see the
secrettime values update, and a newsecretvalue which is valid for another 90 days.Request:
 curl -X POST https://cws.citrixworkspacesapi.net/{CUSTOMER_ID}/rpclients{CLIENT_NAME}/$rotateSecret --header "Authorization: CWSAuth bearer=$token"
 <!--NeedCopy-->
Response:
 {
     "client": {
         "name": "customer-private-305",
         "display_name": "Demo Client",
         "api_key": "api_key",
         "secret_update_time": 1691151918,
         "secret_expiration": 1698927918,
         "secret_update_time_old": 1691151918,
         "secret_expiration_old": 1693958400,
         "owner": "customer@customer.com",
         ...
     },
     "secret": "{NEW_SECRET}"
 }
 <!--NeedCopy-->
Once the client has been rotated, you can start using the new Client secret in your application, and the old secret continues to work until it expires, or until you trigger an expiry.
To perform an expiry of the old secret:
- Ensure you have updated your app to use the new Client Secret, as it is not possible to authenticate using the expired client secret.
-
Perform a web request to expire the old secret:
Request:
 curl -X POST https://cws.citrixworkspacesapi.net/{CUSTOMER_ID}/rpclients/{CLIENT_NAME}/$expireOldSecret --header "Authorization: CWSAuth bearer=$token"
 <!--NeedCopy-->
The response is a
200 OKwith an empty body, indicating the secret has been expired.
Enable and Disable Clients
Newly created clients are enabled by default. However, it is possible to disable them in the admin portal. This causes any application using them to stop working until the client is re-enabled.
The status of a client can be seen on the client page:
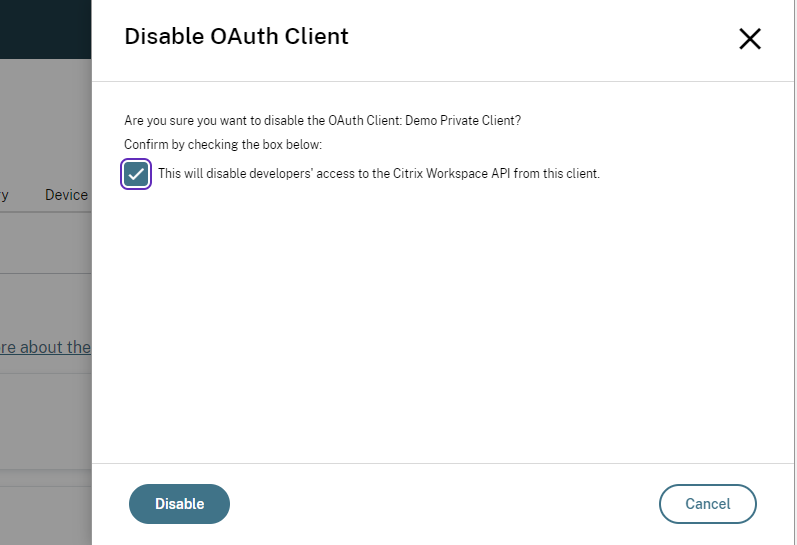
Clicking on the three dots, you can select ‘Disable this client’ and tick the confirmation box:
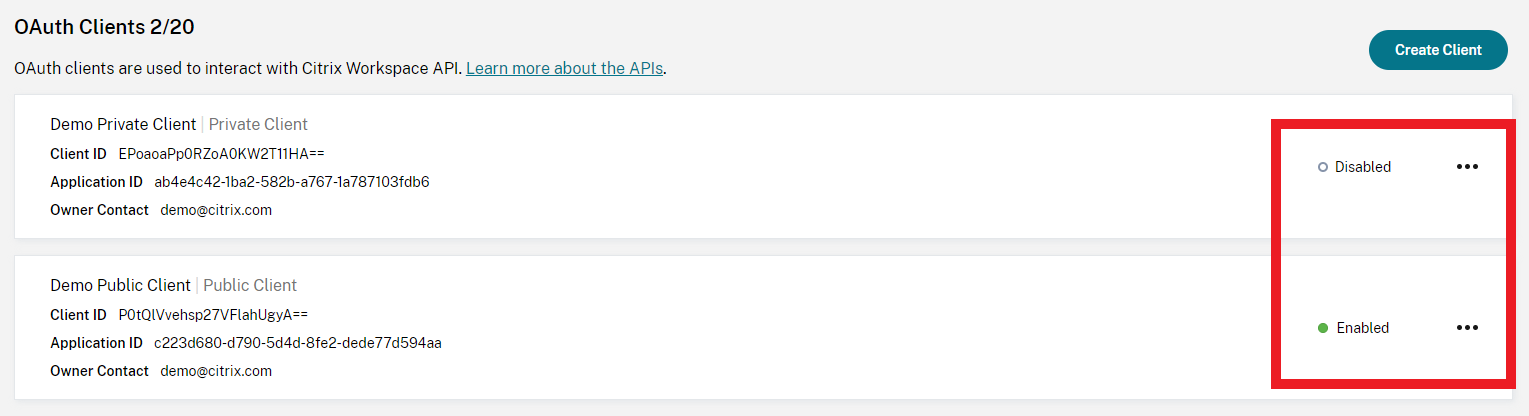
Once disabled, the client shows that on the client page:
It can then be re-enabled following a similar process.
If the client is disabled and an application attempts to use it for the authorization code flows, it gets a 400 Bad Request back from the Citrix Authorization Server as detailed here.
Editing a Client
You can edit the following information for a client:
- Display Name
- Requiring User Consent
- Redirect URIs
- Login to Citrix Cloud Admin Portal and navigate to ‘Identity and Access Management’ - ‘API Access’ - ‘Workspace API’.
-
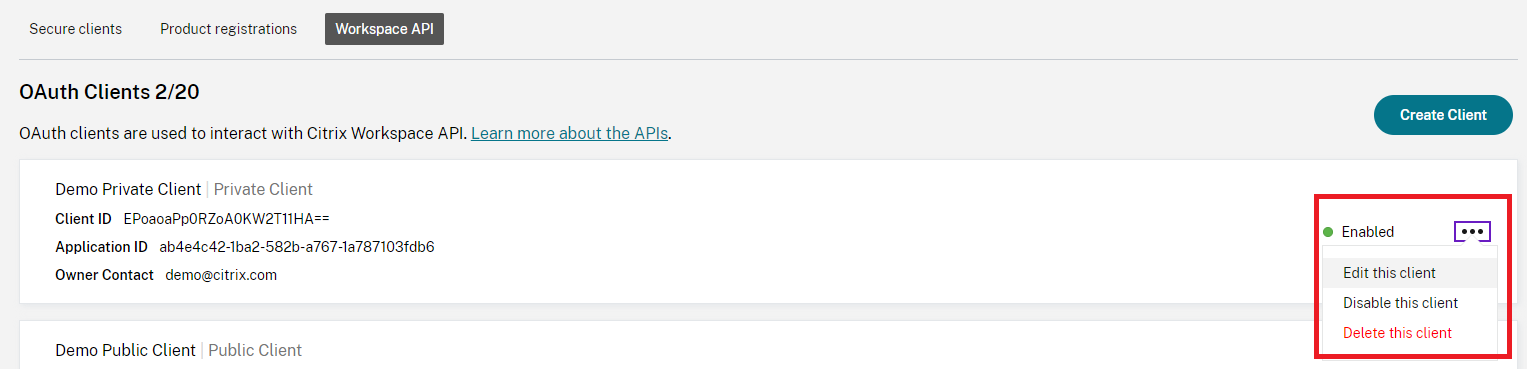
Find the client you want to edit in the client list, click on the three dots, and select ‘Edit this client’:
-
Click on the Client settings tab:
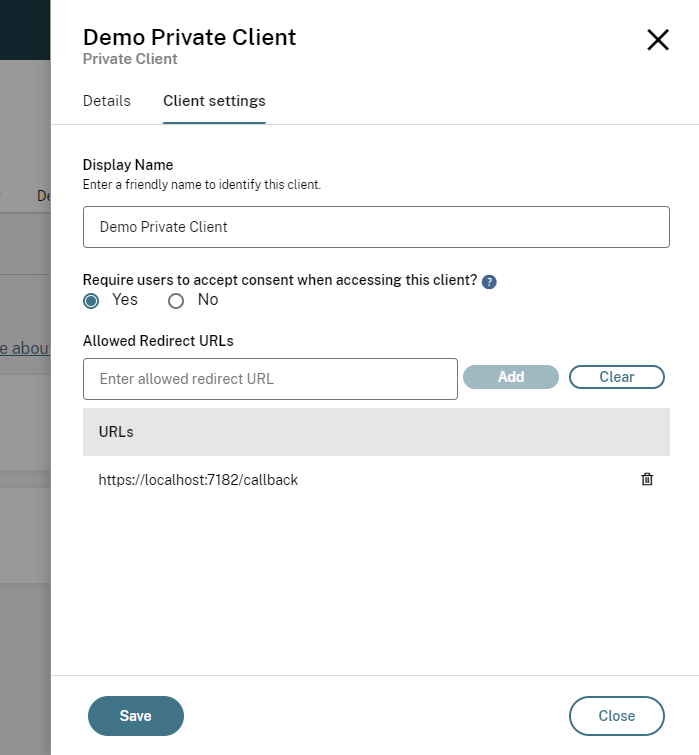
- Make any changes and click ‘Save’.
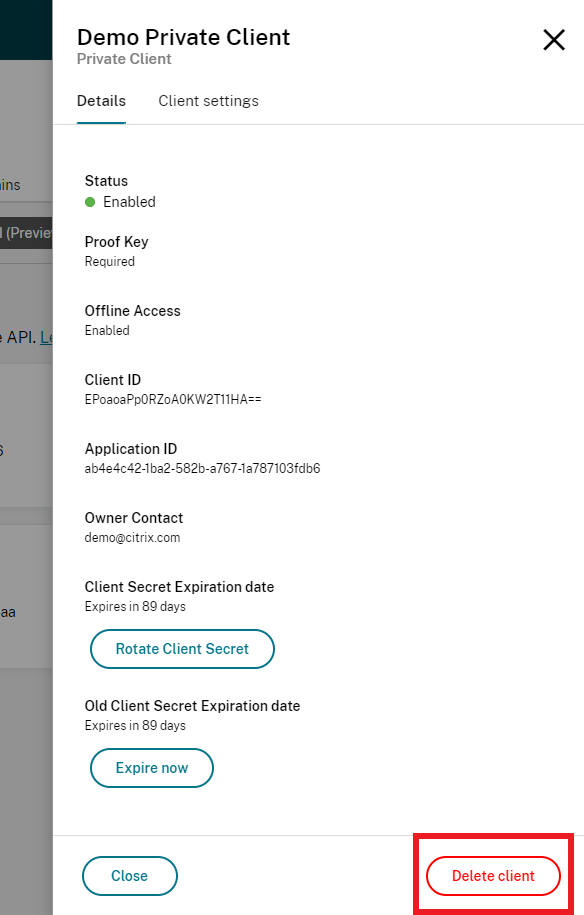
Deleting a Client
Deleting a client means that any application using the client stops working.
To delete a client via the dropdown menu:
- Login to Citrix Cloud Admin Portal and navigate to ‘Identity and Access Management’ - ‘API Access’ - ‘Workspace API’.
-
Find the client you want to delete in the client list, click on the three dots, and select ‘Delete this client’:
-
A confirmation appears. Select the confirmation and click ‘Delete Client’:
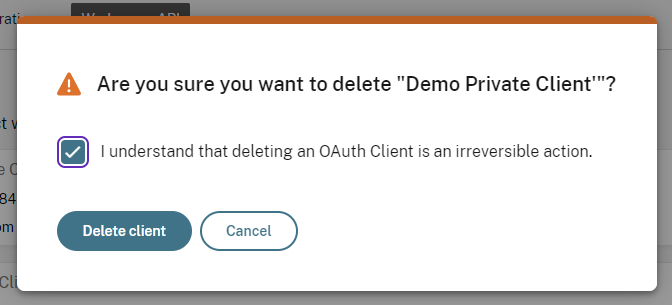
- The client can now be deleted and afterwards, disappears from the client list.
You can also delete the client via the client details page: