Setting up the Citrix micro VPN SDKs for Xamarin
-
Clone the Citrix MAM SDK repository.
 git clone https://github.com/citrix/citrix-mam-sdks.git
 <!--NeedCopy-->
You can find the Citrix micro VPN NuGet packages for Xamarin in the following location: <path>/citrix-mam-sdks/xamarin
This folder contains all the necessary NuGet libraries required to build apps using the Xamarin.Android(Native) and Xamarin.Forms frameworks using the Citrix MAM SDK.
-
Alternatively, you can download the Citrix Xamarin MAM SDK zip file.
Note: A Citrix developer account is required to download the zip file.
Unzip the file MAM_SDK_for_Android_Xamarin_23.1.0.3.zip.
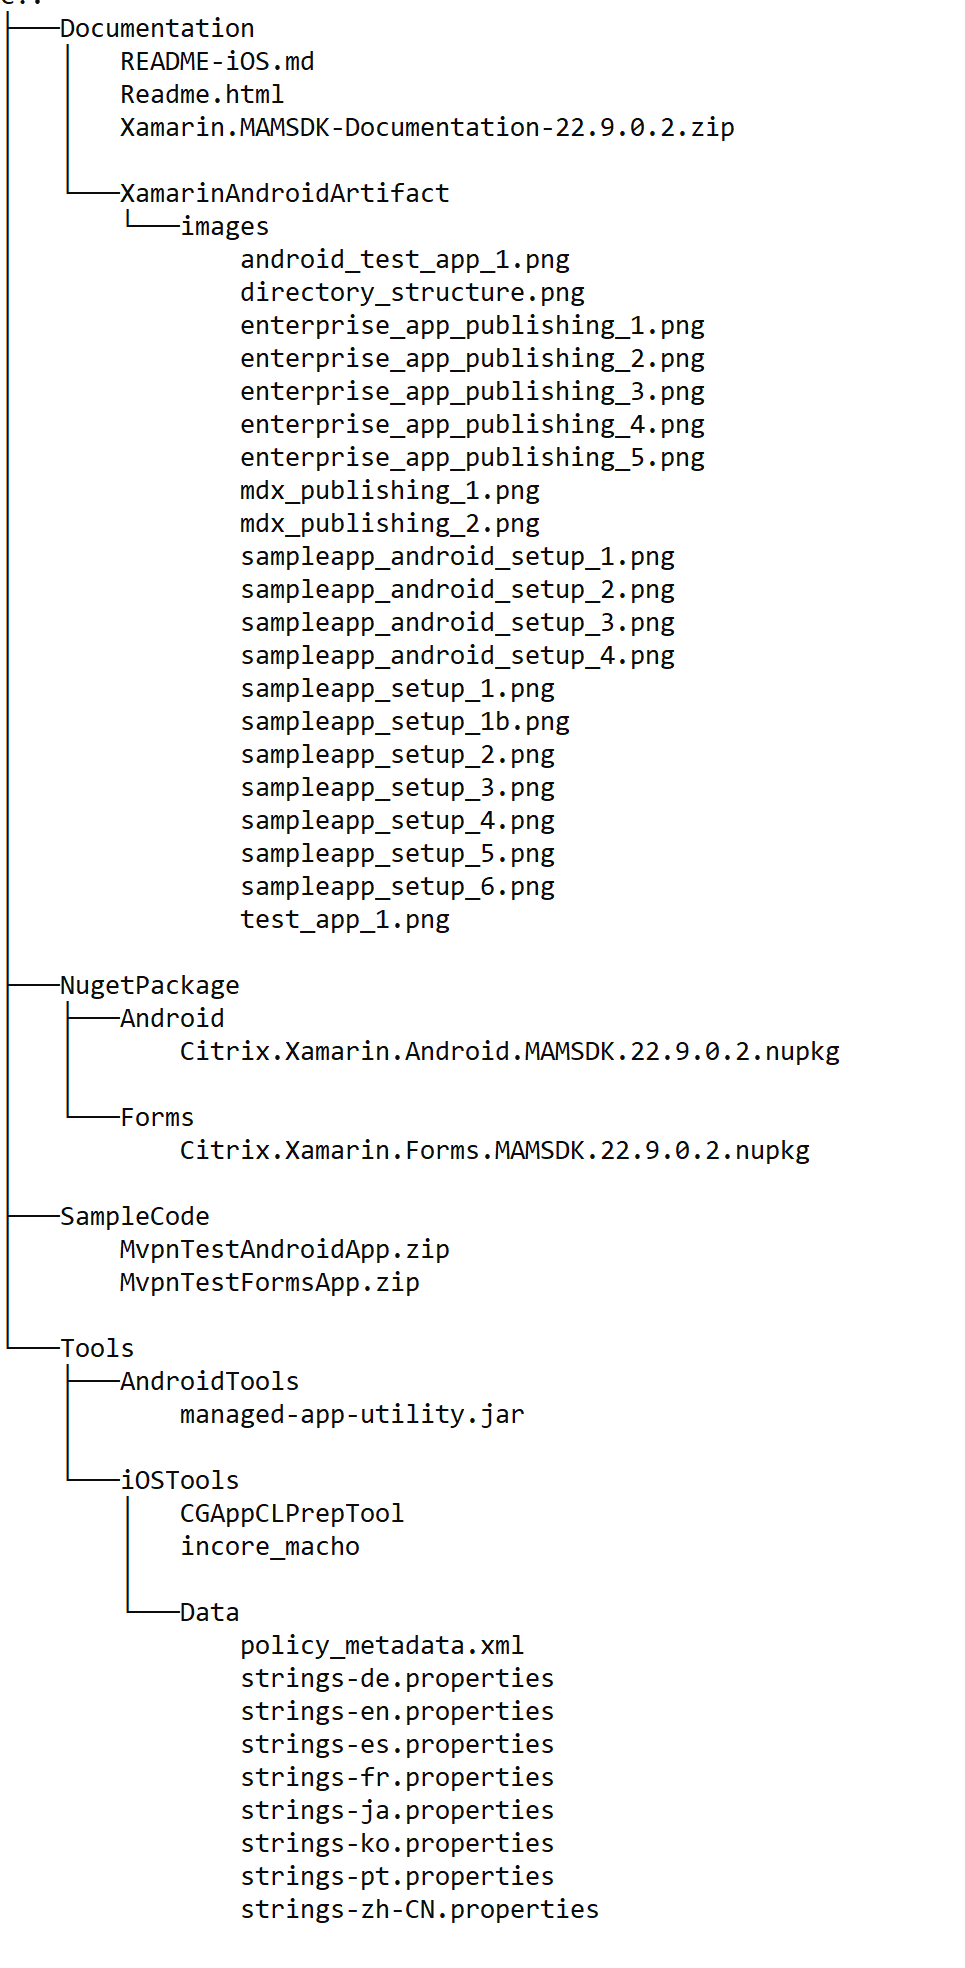
 unzip MAM_SDK_for_Android_Xamarin_23.1.0.3.zip -d MAM_SDK_for_Android_Xamarin_23.1.0.3
 <!--NeedCopy-->
The unzipped folder will have the following directory structure:
-
Add NuGet sources to your project to point to the Xamarin MAM SDK NuGet libraries.
For a Xamarin.Android(Native) app, you only need to add the
Xamarin.MAMSDK.AndroidNuGet source.nuget sources Add -Name Xamarin.MAMSDK.Android -Source <Path to the Xamarin MAM SDK>/NugetPackage/Android <!--NeedCopy-->For a Xamarin.Forms app, you need to add both the
Xamarin.MAMSDK.AndroidandXamarin.MAMSDK.FormsNuGet sources.nuget sources Add -Name Xamarin.MAMSDK.Android -Source <Path to the Xamarin MAM SDK>/NugetPackage/Android nuget sources Add -Name Xamarin.MAMSDK.Forms -Source <Path to the Xamarin MAM SDK>/NugetPackage/Forms <!--NeedCopy--> -
Change the DeX compiler to
d8in your Xamarin project.Add the element
<AndroidDexTool>d8</AndroidDexTool>in thePropertyGroupnodes in your .csproj file.<PropertyGroup Condition=" '$(Configuration)|$(Platform)' == 'Debug|AnyCPU' "> … <AndroidDexTool>d8</AndroidDexTool> … </PropertyGroup> <PropertyGroup Condition=" '$(Configuration)|$(Platform)' == 'Release|AnyCPU' "> … <AndroidDexTool>d8</AndroidDexTool> … </PropertyGroup> <!--NeedCopy--> -
Change the
minSdkVersionandtargetSdkVersionin your Androidmanifest.xml file.<uses-sdk android:minSdkVersion="24" android:targetSdkVersion="31" /> <!--NeedCopy--> -
Add Citrix Xamarin NuGet packages in your Xamarin project and change the
versionto the latest Xamarin MAM SDK version number.If your app is using Xamarin.Android (Native) and not Xamarin.Forms, add the Citrix.Xamarin.Android.MAMSDK NuGet library to your packages.config file.
 <package id="Citrix.Xamarin.Android.MAMSDK" version="23.1.0.3" targetFramework="monoandroid10.0" />
 <!--NeedCopy-->
If your app is using Xamarin.Forms, you must add both the Citrix.Xamarin.Android.MAMSDK and Citrix.Xamarin.Forms.MAMSDK packages to your .csproj file:
<PackageReference Include="Citrix.Xamarin.Android.MAMSDK"> <Version>23.1.0.3</Version> </PackageReference> <PackageReference Include="Citrix.Xamarin.Forms.MAMSDK"> <Version>23.1.0.3</Version> </PackageReference> <!--NeedCopy--> -
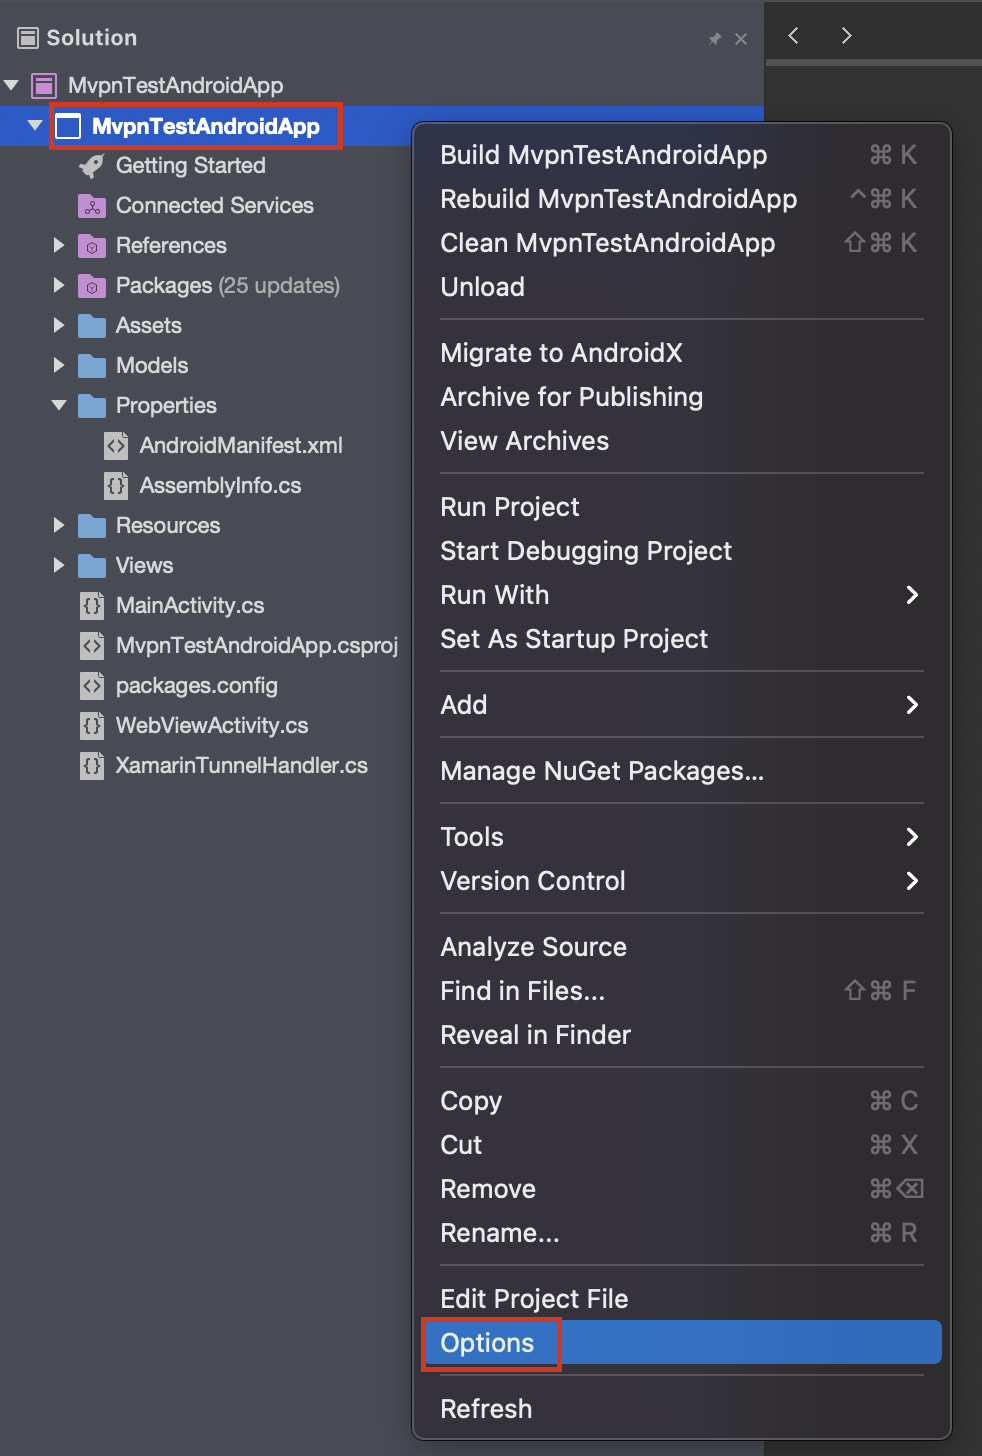
Add your KeyStore details using the IDE or by editing your .csproj file.
Expand for IDE instructions:
- Right-click the project and click Options.
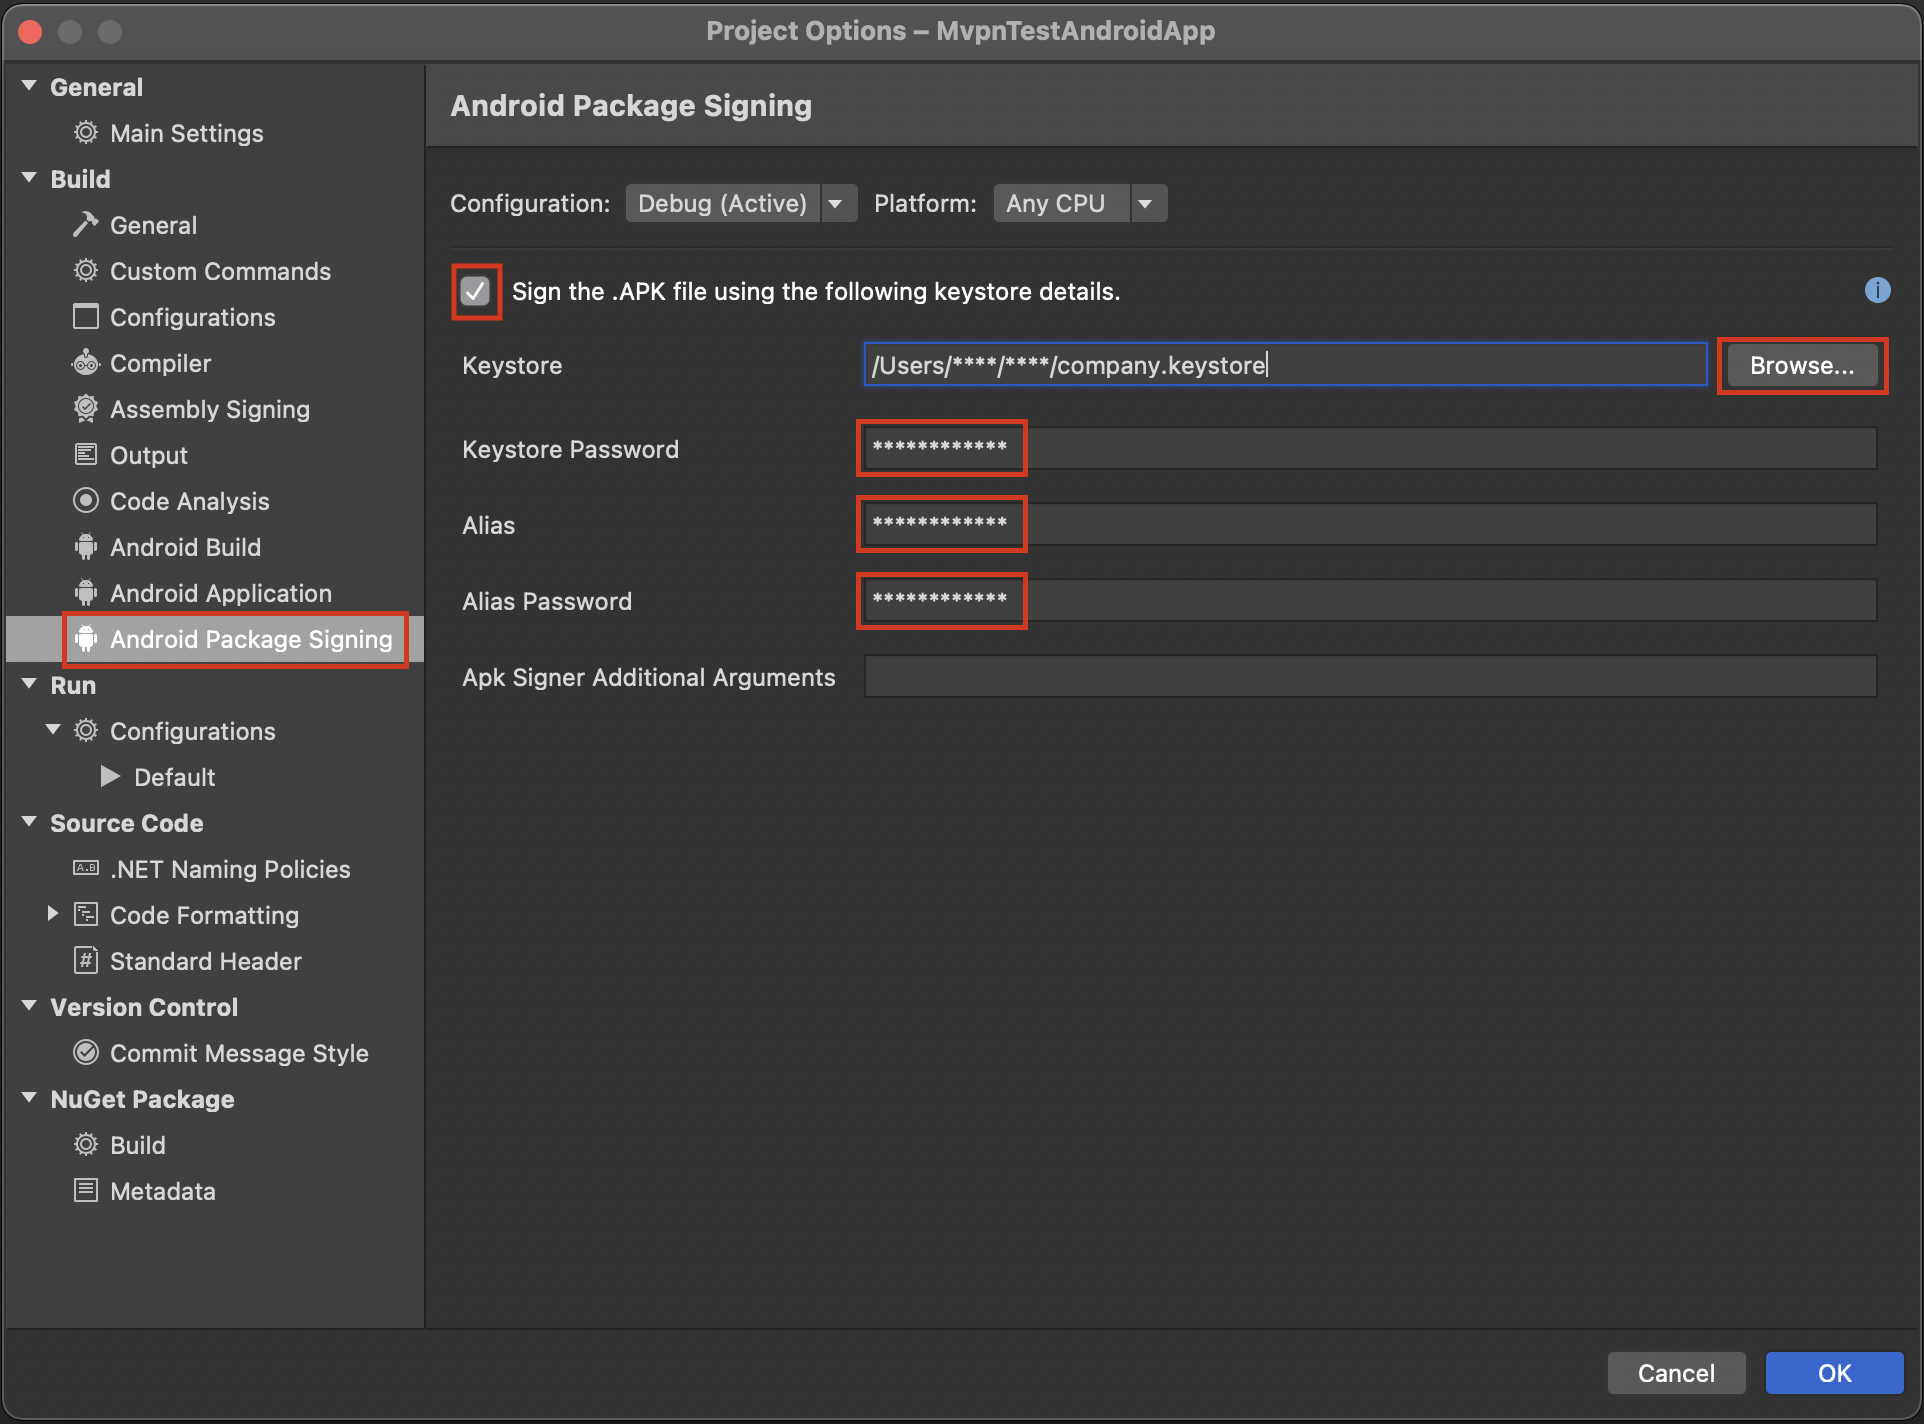
- Expand Build and click Android Package Signing.
- Select the Sign the APK file using the following KeyStore details check box.
- Fill in your KeyStore details.
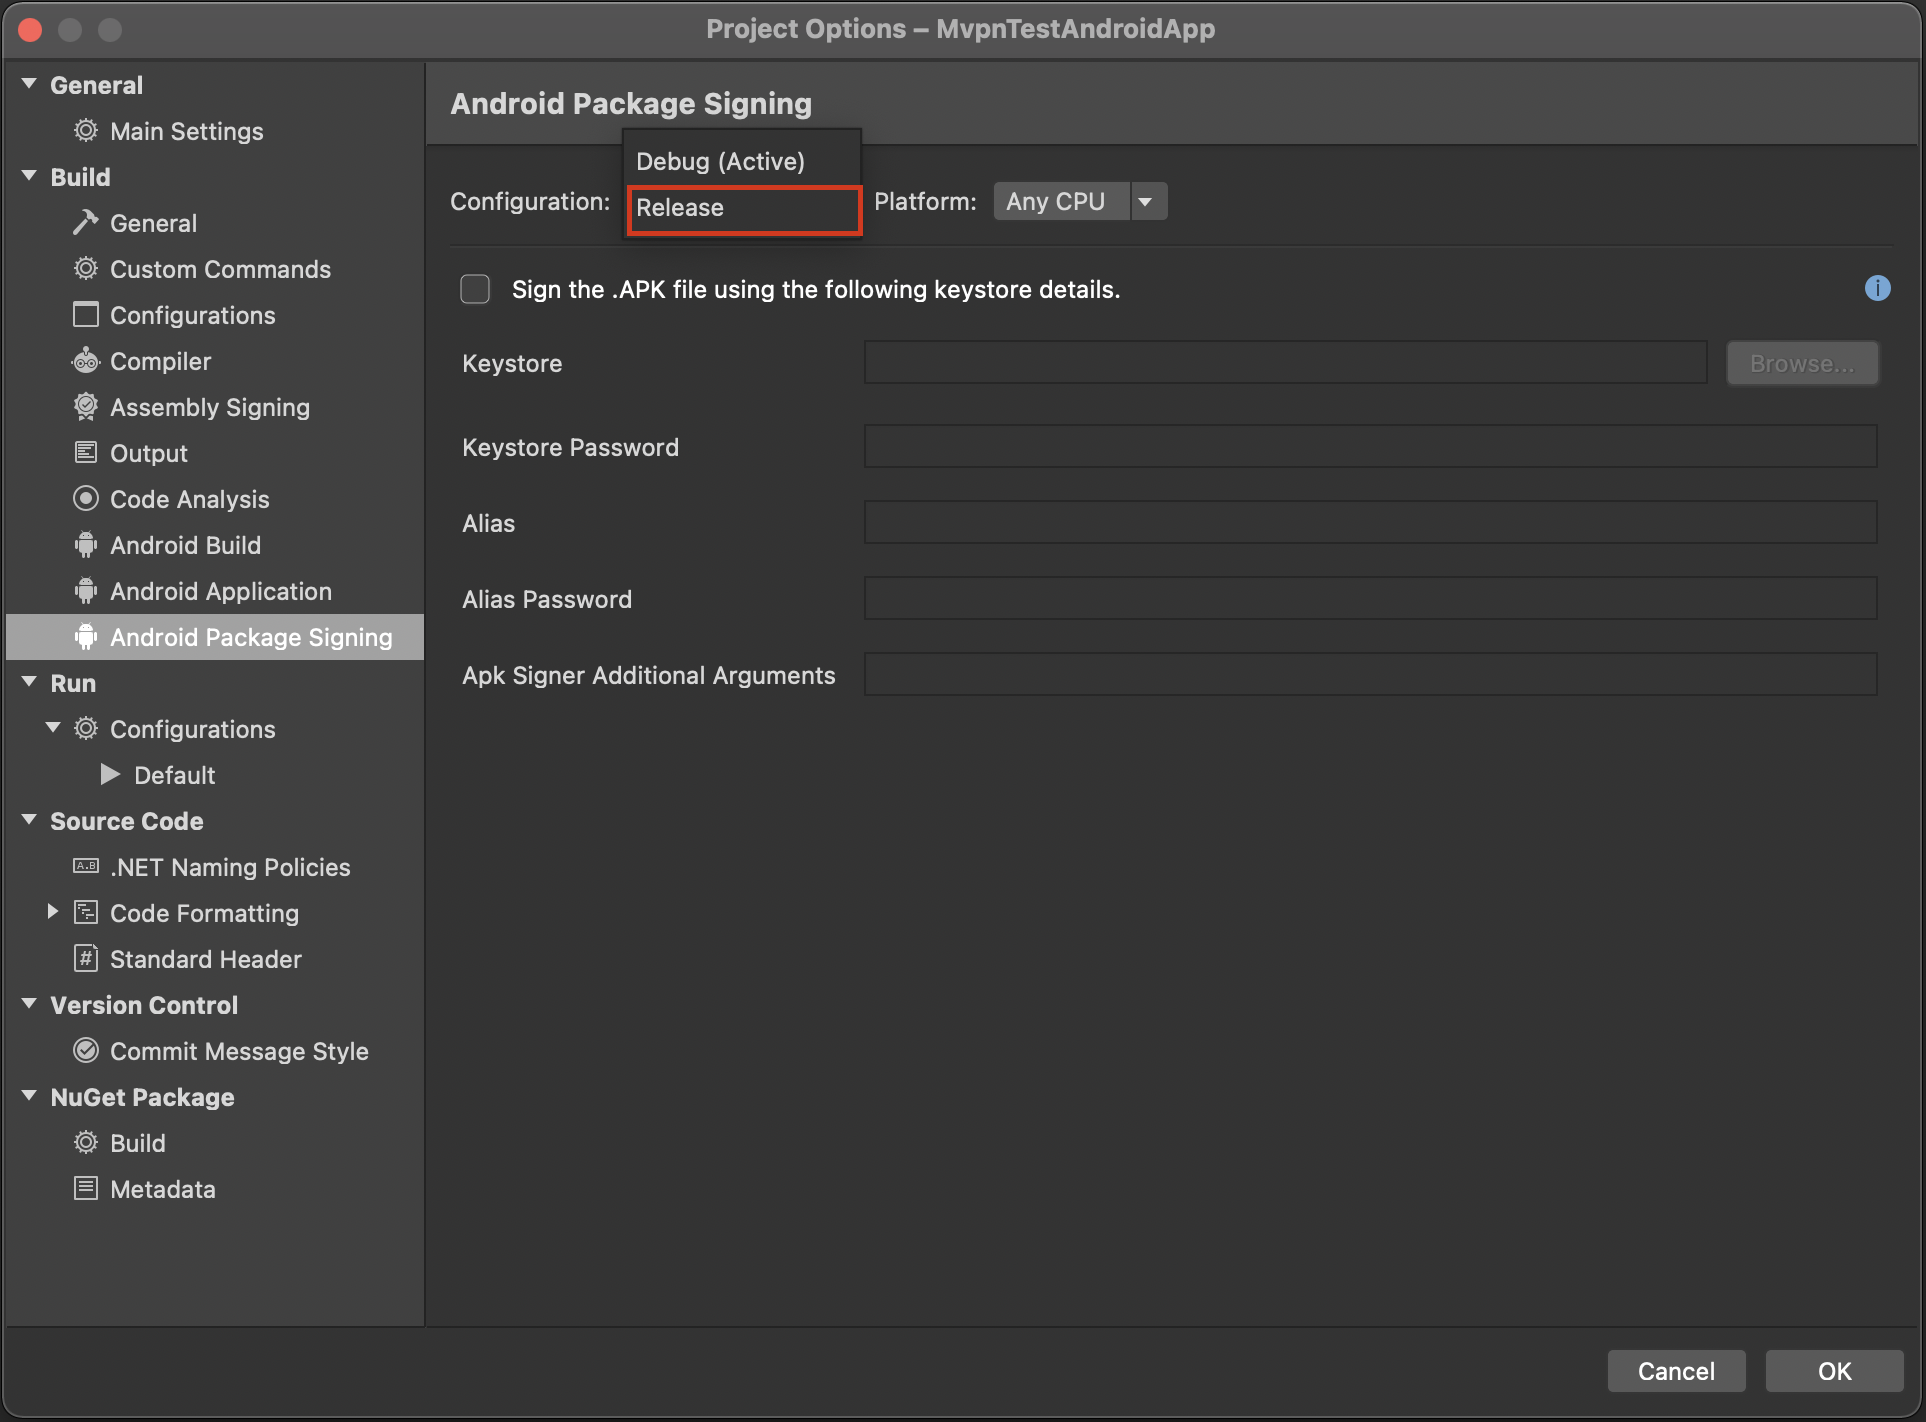
After you have completed the preceding step, perform the following:
- Change the Configuration to Release.
- Select the Sign the APK file using the following KeyStore details check box.
- Fill in your KeyStore details.
Expand for source code:
Add your KeyStore and key details to your .csproj file:
<PropertyGroup Condition=" '$(Configuration)|$(Platform)' == 'Debug|AnyCPU' "> … <AndroidKeyStore>True</AndroidKeyStore> <AndroidSigningKeyStore>/Users/****/Downloads/mycompany.keystore</AndroidSigningKeyStore> <AndroidSigningStorePass>*****</AndroidSigningStorePass> <AndroidSigningKeyAlias>*****</AndroidSigningKeyAlias> <AndroidSigningKeyPass>****</AndroidSigningKeyPass> … </PropertyGroup> <PropertyGroup Condition=" '$(Configuration)|$(Platform)' == 'Release|AnyCPU' "> … <AndroidKeyStore>True</AndroidKeyStore> <AndroidSigningKeyStore>/Users/****/Downloads/mycompany.keystore</AndroidSigningKeyStore> <AndroidSigningStorePass>*****</AndroidSigningStorePass> <AndroidSigningKeyAlias>*****</AndroidSigningKeyAlias> <AndroidSigningKeyPass>****</AndroidSigningKeyPass> … </PropertyGroup> <!--NeedCopy--> -
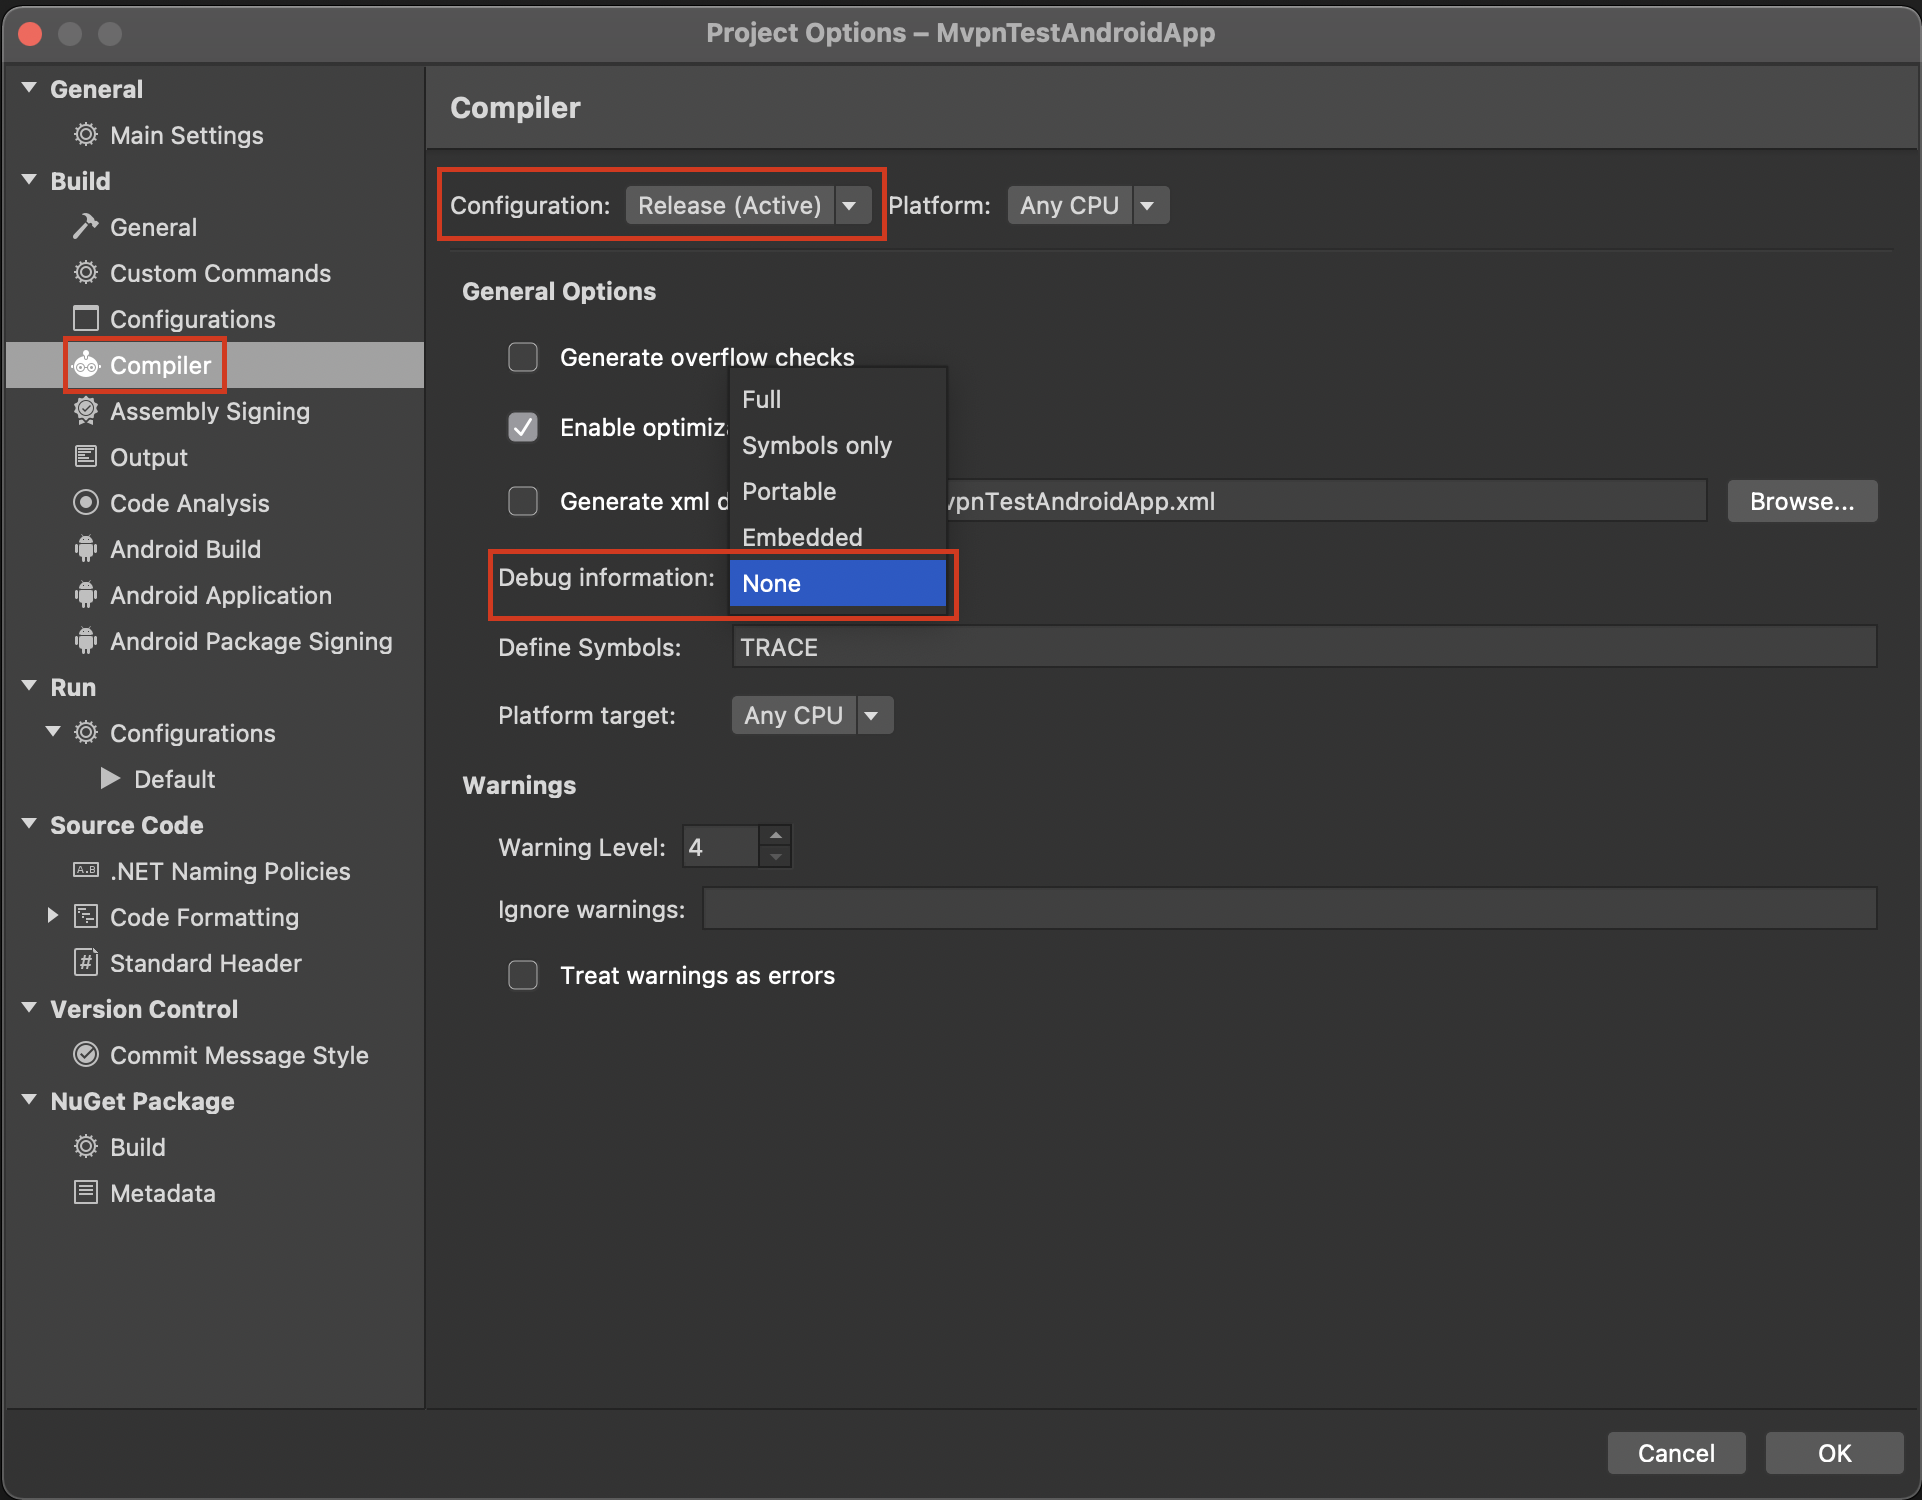
Change the Release build to include no debugging information.
- Right-click the main project and click Options.
- Expand Build and click Compiler.
- Set the Configuration to Release
- Set Debug Information to None.
-
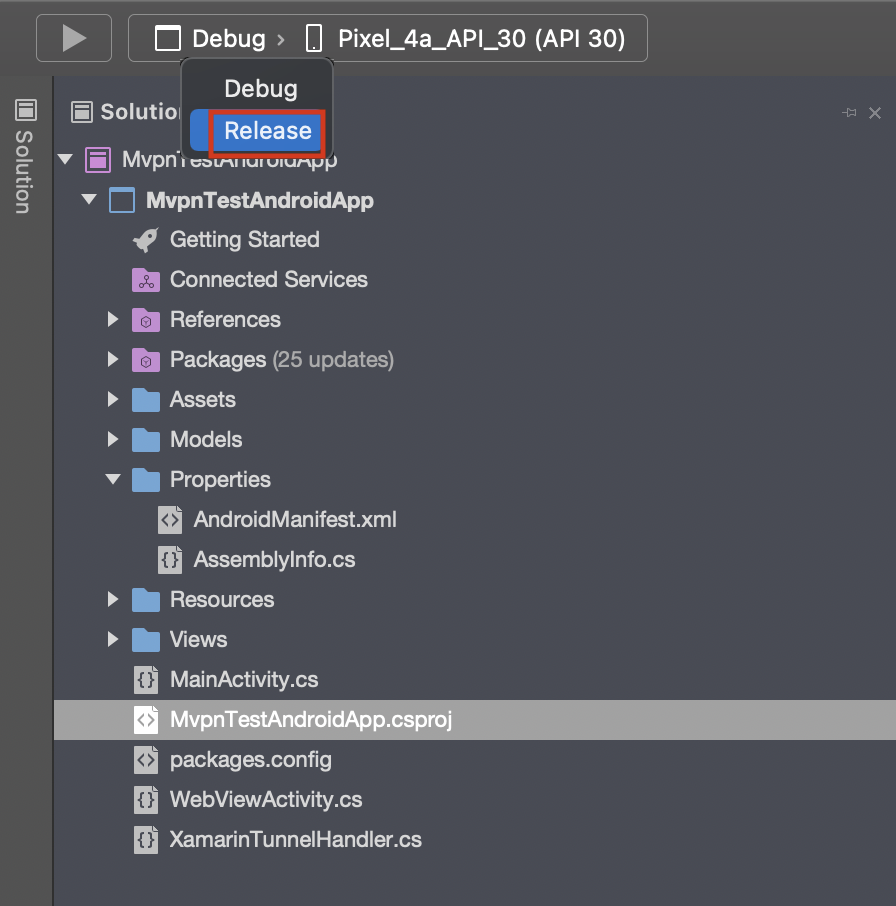
Set the build type to Release or Debug.
-
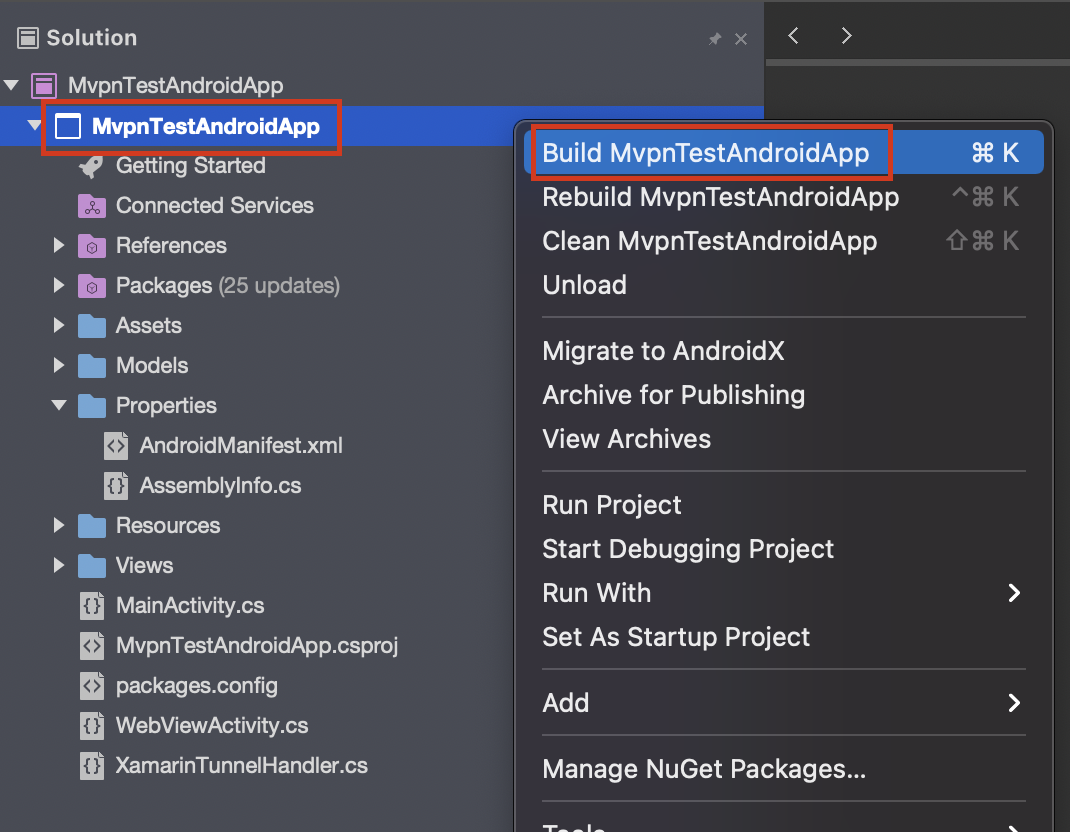
Right-click the project and click Build or Rebuild.
Wait for the build to complete successfully.
-
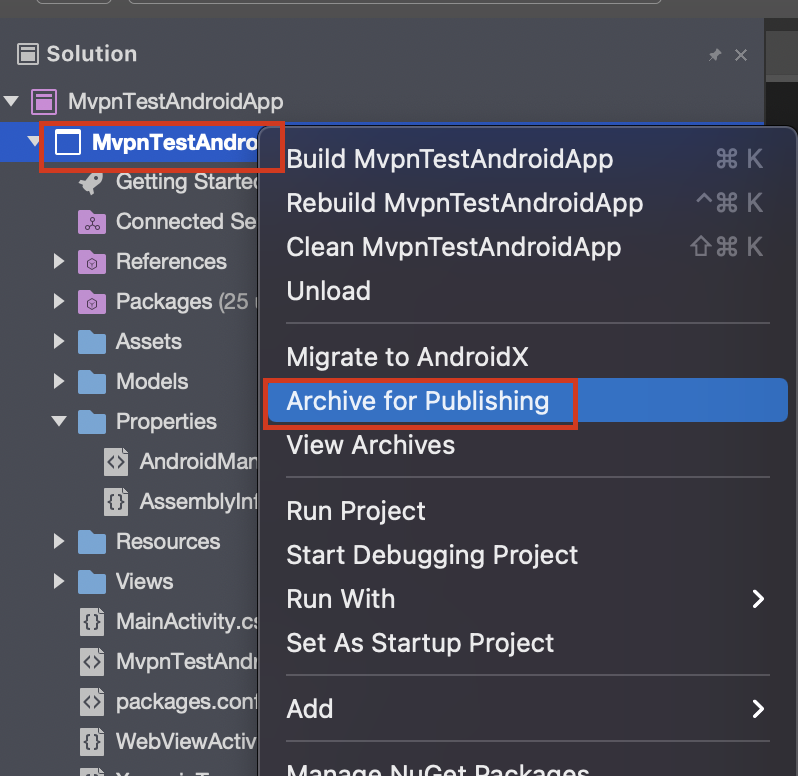
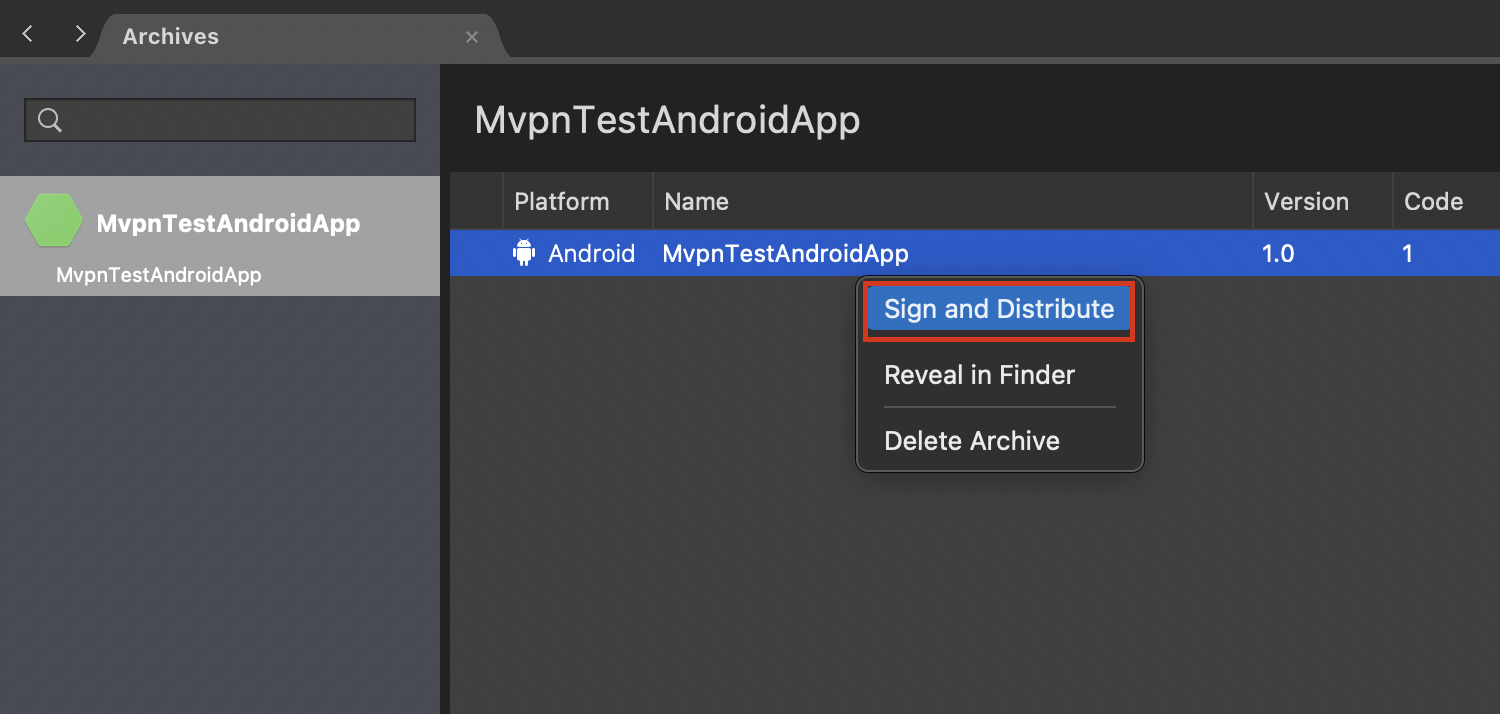
Right-click the project and click Archive for Publishing.
-
Right-click the archive and click Sign and Distribute.
-
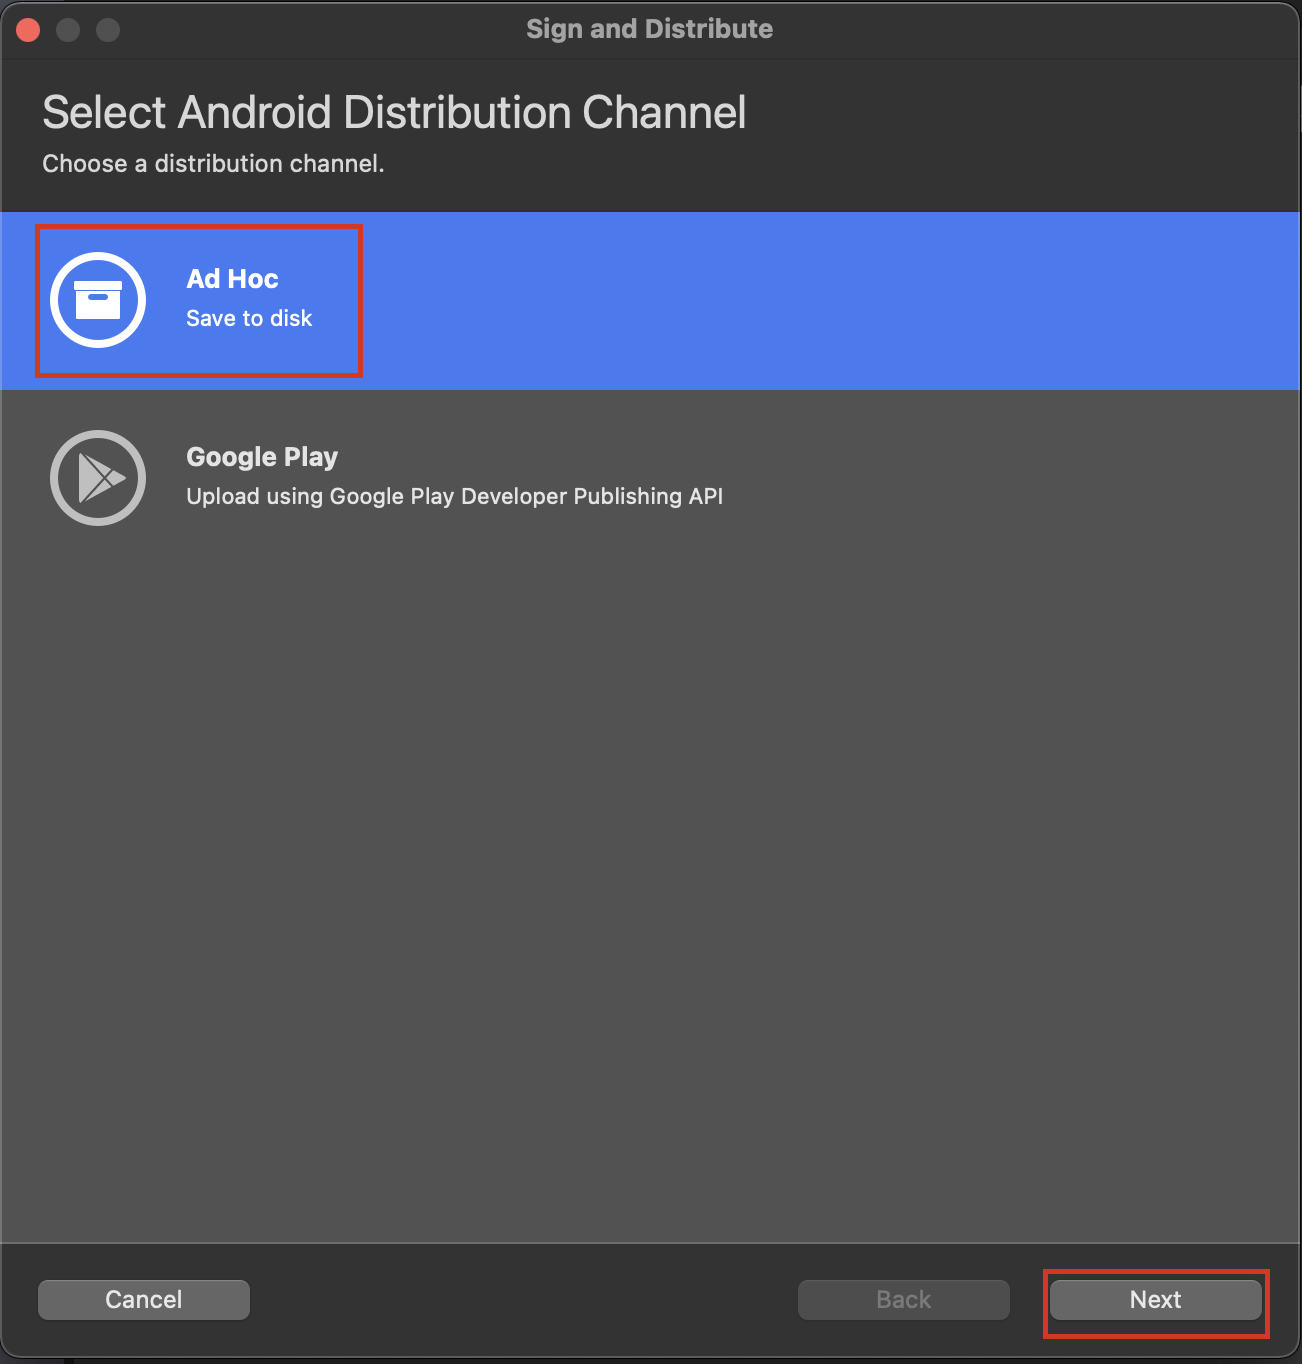
Select Ad-Hoc and click Next.
-
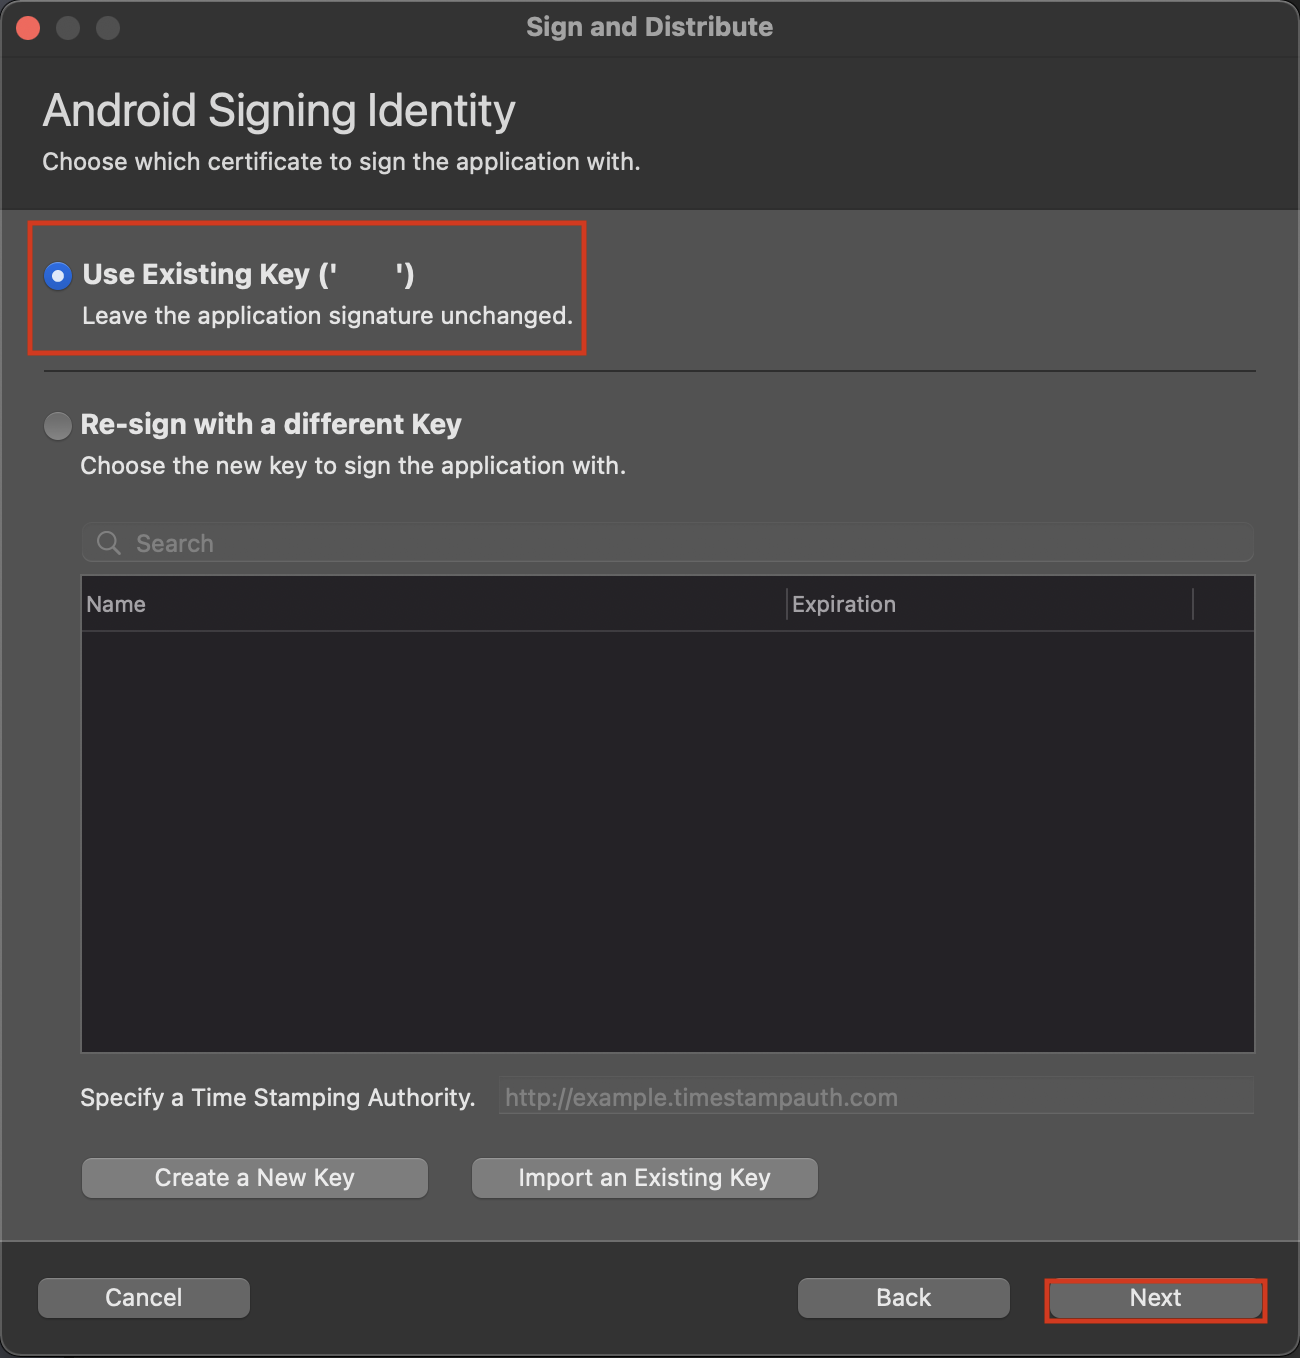
Choose your signing option and click Next.
-
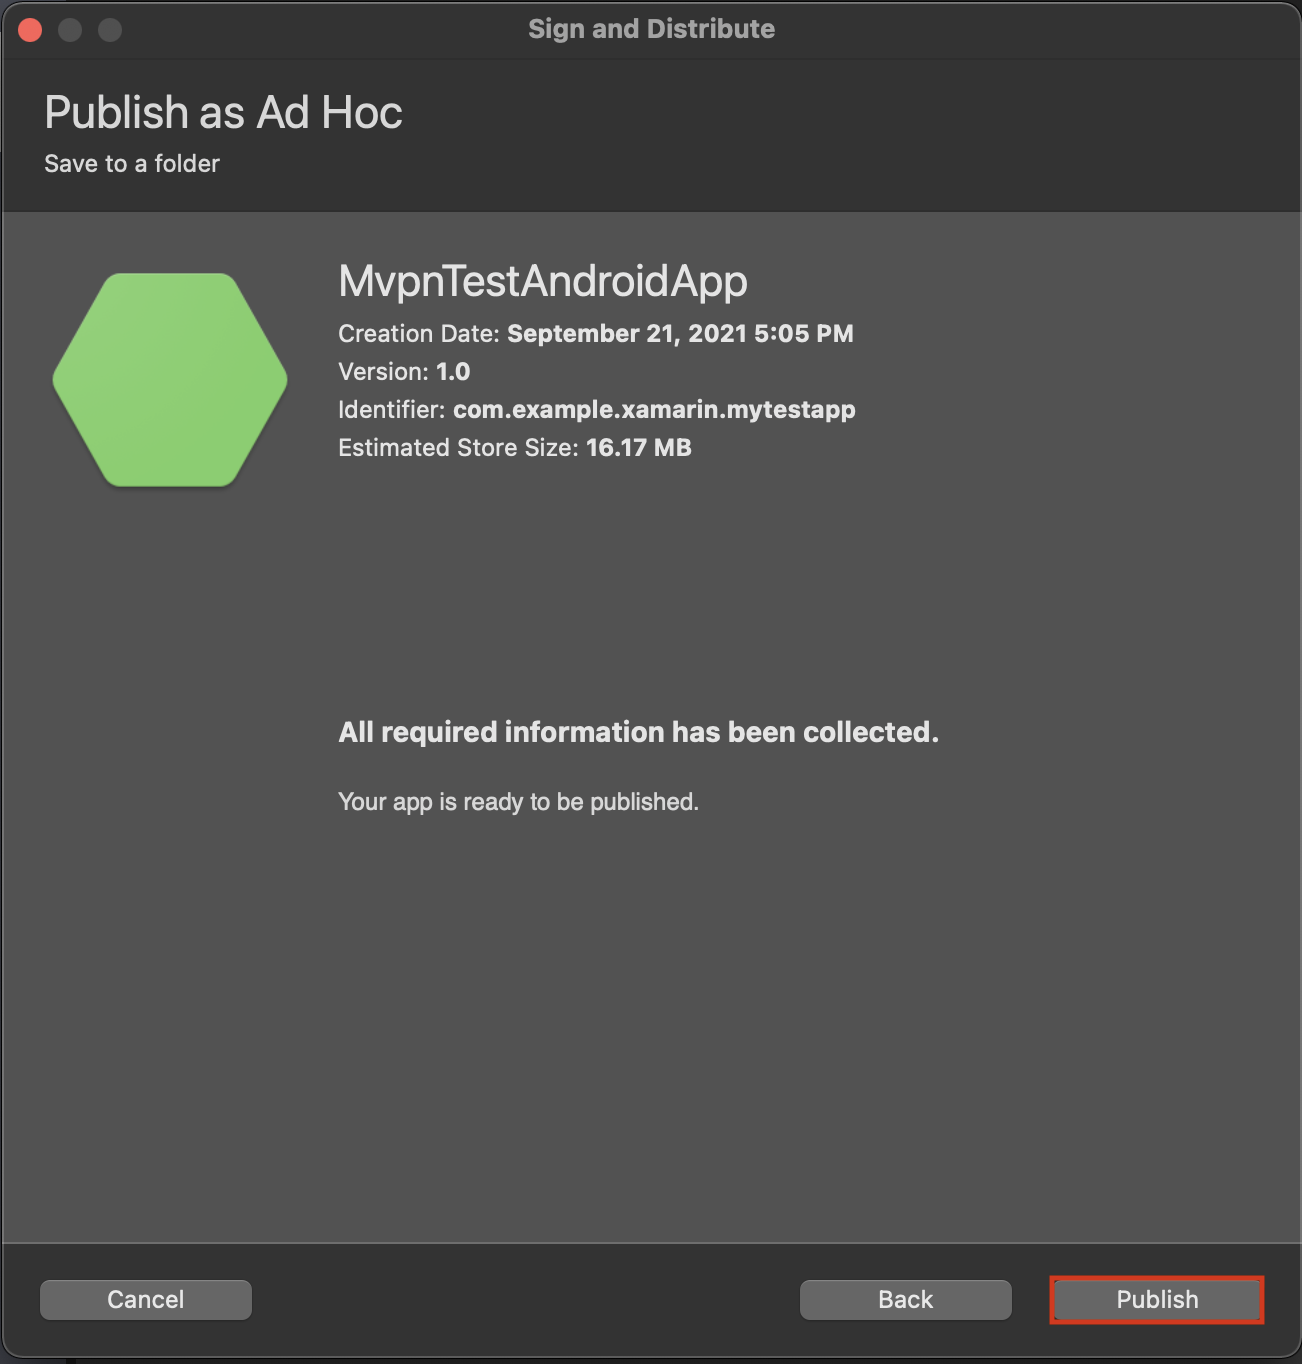
Click Publish.
-
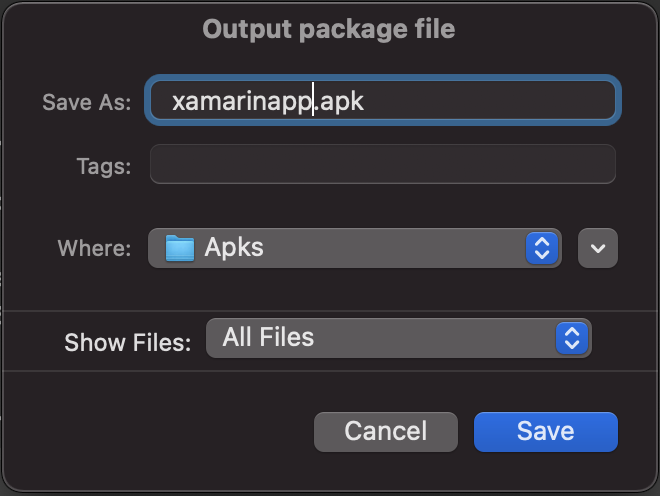
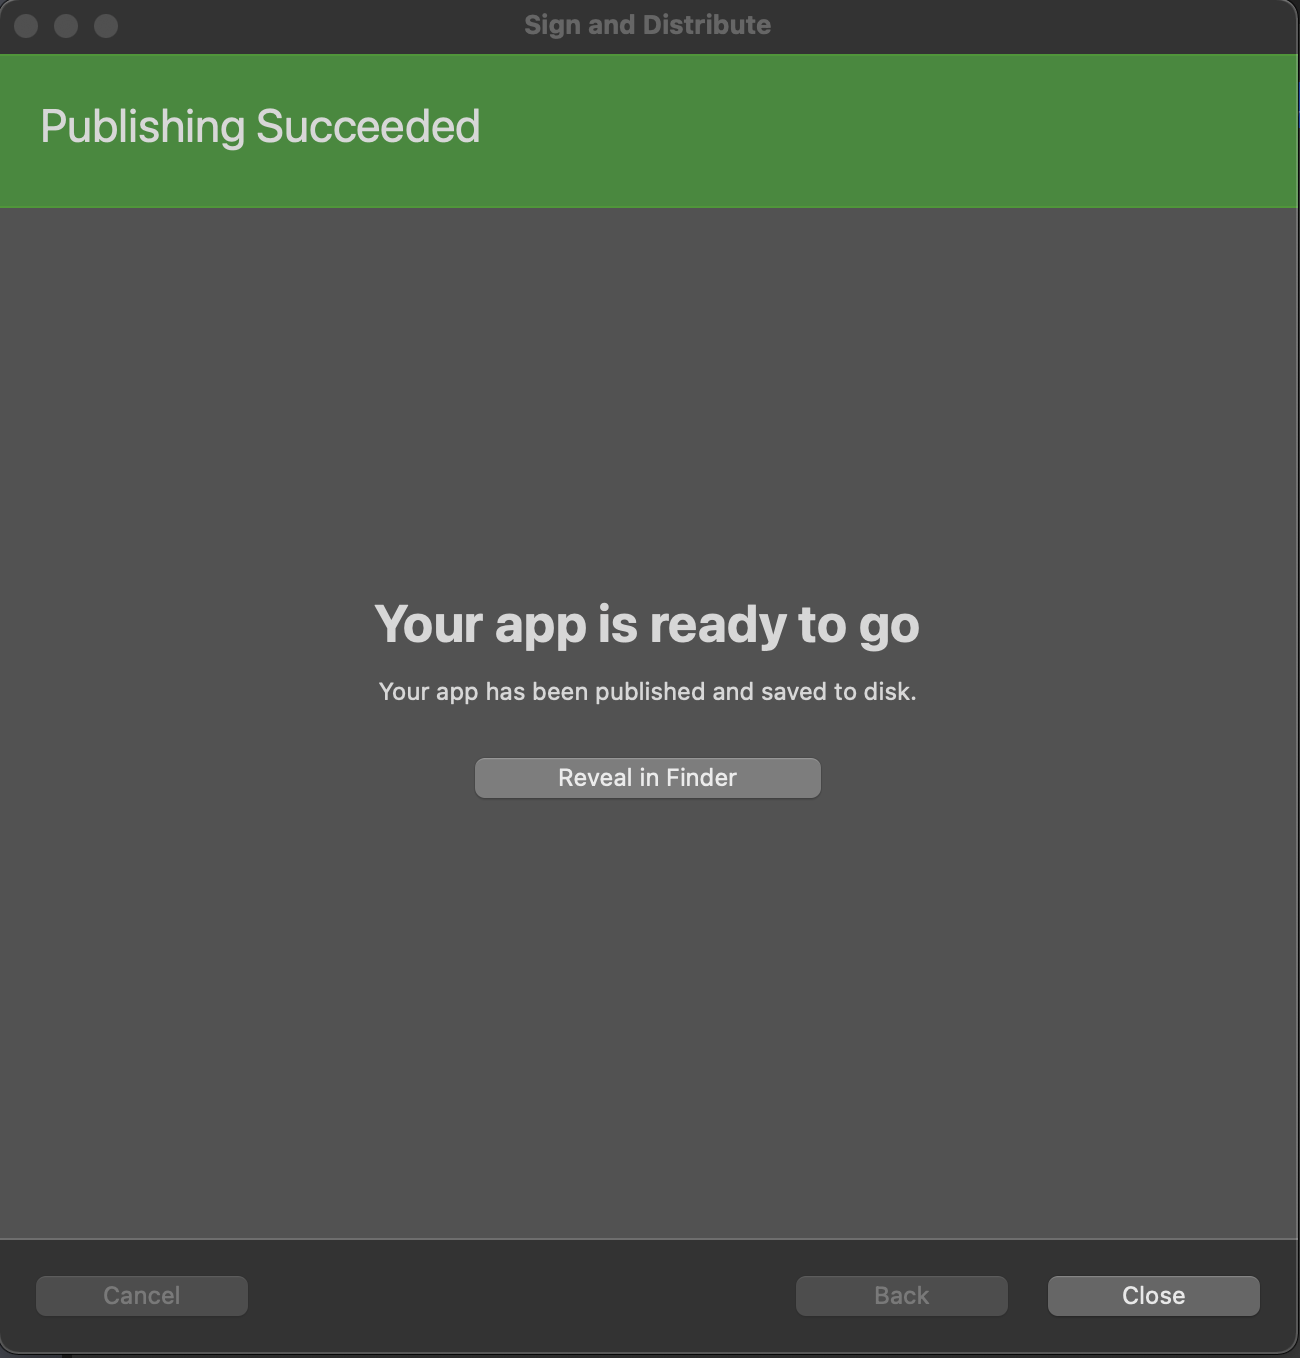
Save the APK at your desired location. A window with the message Publishing Succeeded appears.
-
Generate the MDX file corresponding to your Xamarin app’s APK file using the command-line utility
managed-app-utility.jar.You must manually generate the MDX file from the APK you saved earlier. You can refer how to manually generate a MDX file in the following page: Generate and update an MDX file.
Note: It is imperative to use the same KeyStore you signed your APK with, when generating the MDX file.
Use the following command to generate the MDX file:
java -jar <mamSdkLib path>/managed-app-utility.jar \ wrap \ -in <path to apk>/<apk name>.apk \ -out <path to save mdx file>/<mdx name>.mdx \ -appType sdkapp \ -keystore <keyStorePath> \ -storepass <keystorePassword> \ -keyalias <keyAlias> \ -keypass <keyPassword> \ -storeUrl "https://play.google.com/store/apps/details?id=<sample.app.package.name>" <!--NeedCopy--> -
To distribute your app, see the following page: Distribute your app.
-
To test and debug your app, see the following pages: