Apps configuration using Secure Private Access API
This topic provides instructions on how to list, create, delete, and update an application using the Secure Private Access API.
1. Get list of applications
The following is an example of a GET request and response for getting a list of policies:
GET https://api.cloud.com/accessSecurity/applications
Successful response sample for getting a list of applications
A 200 OK response with a JSON body:
{
    "items": [
        {
            ...Application #1...
        },
        {
            ...Application #2...
        },
        {
            ...Application #3...
        },
        {
            ...Application #4...
        }
    ],
    "totalNum": 4
}
<!--NeedCopy-->
A set of optional parameters can be used in the GET request to paginate the list of elements, order, and filter out some of them. These parameters are offset, limit, orderby, sort, name, and type.
The following is an example of a GET request and response for getting a list of policies:
GET https://api.cloud.com/accessSecurity/applications?offset=0&limit=2&name=TestApplication&type=ztna&orderby=name&sort=asc
Successful response sample for getting a list of applications
A 200 OK response with a JSON body:
{
    "items": [
        {
            ...Application #1...
        },
        {
            ...Application #2...
        },
        {
            ...Application #3...
        }
    ],
    "totalNum": 4
}
<!--NeedCopy-->
For detailed information on how to get a list of applications using the Secure Private Access API, see Handling Applications.
Note:
You can also get the list of applications from the Citrix Secure Private Access service user interface. Navigate to the Applications tab. The Applications tab lists all the applications that are configured.
2. Get a specific application
The following is an example of a GET request and response for getting a specific application. The application’s UUID is appended to the request URL:
GET https://api.cloud.com/accessSecurity/applications/{{applicationUUID}}`
Successful response sample
A 200 OK response with a JSON body that contains an application object:
Response Body Sample
{
    "state": "incomplete",
    "usingTemplate": true,
    "templateName": "Test Template",
    "name": "Test",
    "type": "web",
    "description": "Test Description",
    "category": "Test Category",
    "locations": [
        {
            "name": "testname",
            "uuid": "1111-1111-1111-1111"
        }
    ],
    "url": "https://sample.com",
    "policies": [],
    "sbsOnlyLaunch": true,
    "mobileSecurity": true,
    "customerDomainFields": {},
    "hidden": false,
    "agentlessAccess": true,
    "destination": [],
    "policyCount": null,
    "createdTime": "2023-01-19T10:00:22Z",
    "relatedURLs": [
        "www.test.com"
    ],
    "icon": "iVBORw0KGg5CYII=",
    "iconURL": "",
    "sso": null,
    "id": "b20788e2-cdf0-490e-adac-5b100271ad3d"
}
<!--NeedCopy-->
For detailed information on how to get a specific application using the Secure Private Access API, see Handling Applications.
Note:
You can also go to a specific application from the Citrix Secure Private Access service user interface. Navigate to the Applications tab. The Applications tab lists all the applications that are configured. You can select the application, as required.

3. Create an application
The following is an example of a POST request and response for creating a new application:
POST https://api.cloud.com/accessSecurity/applications
Request body sample for creating an application
{
  "name": "Test",
  "type": "web",
  "description": "Test Description",
  "category": "Test Category",
  "locations": [
    {
      "name": "testname",
      "uuid": "1111-1111-1111-1111"
    }
  ],
  "url": "https://sample.com",
  "policies": [
    {
      "type": "patterns",
      "data": {}
    }
  ],
  "sbsOnlyLaunch": true,
  "mobileSecurity": true,
  "customerDomainFields": {},
  "hidden": false,
  "agentlessAccess": true,
  "destination": [],
  "policyCount": "Test Count",
  "createdTime": {},
  "relatedURLs": ["www.test.com"],
  "icon": "SXQgY2Fubm90IGJlIWdodGVyLgo=",
  "iconURL": "iconurl.com",
  "sso": {},
  "usingTemplate": true,
  "templateName": "Test Template"
}
<!--NeedCopy-->
Response body sample for creating an application
{
    "state": "incomplete",
    "usingTemplate": true,
    "templateName": "Test Template",
    "name": "Test",
    "type": "web",
    "description": "Test Description",
    "category": "Test Category",
    "locations": [
        {
            "name": "testname",
            "uuid": "1111-1111-1111-1111"
        }
    ],
    "url": "https://sample.com",
    "policies": [],
    "sbsOnlyLaunch": true,
    "mobileSecurity": true,
    "customerDomainFields": {},
    "hidden": false,
    "agentlessAccess": true,
    "destination": [],
    "policyCount": null,
    "createdTime": "2023-01-18T14:43:17Z",
    "relatedURLs": [
        "www.test.com"
    ],
    "icon": "iVBORw0KGg5CYII=",
    "iconURL": "iconurl.com",
    "sso": null,
    "id": "b20788e2-cdf0-490e-adac-5b100271ad3d"
}
<!--NeedCopy-->
For detailed information on how to create an application using the Secure Private Access API, see Handling Applications.
Note:
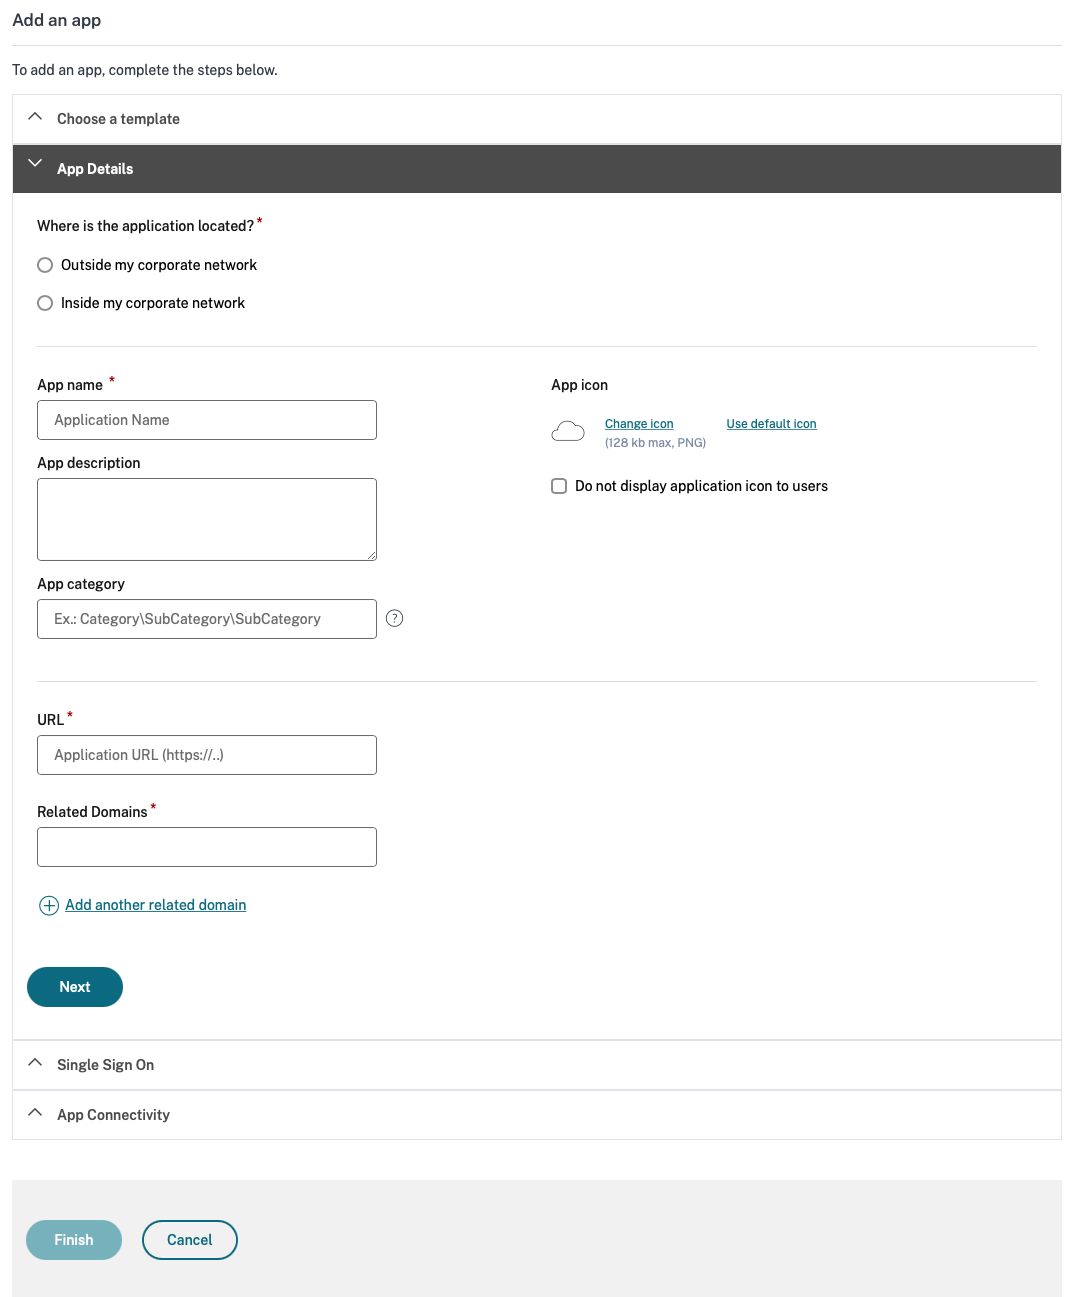
You can also create an app from the Citrix Secure Private Access service user interface. Navigate to the Applications tab, and then click Add an app.

Note the following on the types of apps.
- Outside my corporate network - The application is a SaaS app.
- Inside my corporate network - The application is a Web app.
- Inside my corporate network and the app type is selected as TCP/UDP - The application is a client-server app.
For more details about creating an app, see Direct access to Enterprise web apps.
4. Update an application
The following is an example of a PUT request and response for updating a specific application. The application’s UUID is appended to the request URL:
PUT https://api.cloud.com/accessSecurity/applications/{{applicationUUID}}`
Request body sample
The following is an example of editing the sbsOnlyLaunch of the application. A standard JSON is used to add the extra element that was edited, the sbsOnlyLaunch in this case.
{
  "name": "Test",
  "type": "ztna",
  "description": "Test Description",
  "category": "Test Category",
  "locations": [
    {
      "name": "testname",
      "uuid": "1111-1111-1111-1111"
    }
  ],
  "policies": [
    {
      "type": "patterns",
      "data": {}
    }
  ],
  "sbsOnlyLaunch": false,
  "mobileSecurity": true,
  "customerDomainFields": {},
  "hidden": false,
  "agentlessAccess": false,
  "destination": [
    {
      "destination": "string",
      "port": "65",
      "protocol": "PROTOCOL_TCP",
      "subtype": "SUBTYPE_HOSTNAME"
    }
  ],
  "policyCount": "Test Count",
  "createdTime": {},
  "icon": "SXQgY2Fubm90IGJlIWdodGVyLgo",
  "iconURL": "iconurl.com",
  "sso": {}
}
<!--NeedCopy-->
Successful response sample
A 204 NO CONTENT response with an empty body.
For detailed information on how to update a specific application using the Secure Private Access API. see Handling Applications.
Note:
You can also edit an application from the Citrix Secure Private Access service user interface.
Navigate to the Applications tab. The Applications tab lists all the applications that are configured.
Select the app, click the ellipsis button, and then click Edit Application.
5. Delete an application
The following is an example of a DELETE request and response for deleting a specific application. The application’s UUID is appended to the request URL:
DELETE https://api.cloud.com/accessSecurity/applications/{{applicationUUID}}`
Successful response sample
A 204 NO CONTENT response with an empty body.
For detailed information on how to delete a specific application using the Secure Private Access API, see Handling Applications.
note:
You can also edit an application from the Citrix Secure Private Access service user interface.
Navigate to the Applications tab. The Applications tab lists all the applications that are configured.
Select the app, click the ellipsis button, and then click Delete.
